
Environment variables are dynamic variables that help us to set configuration variables such as URLs for both the development and global environment at once, it also makes it hard for others to see the value inside (However it will be included in the build file so it does not entirely hide the values from being seen).
As many tools and frameworks exist to create an application, setting up and using the environment variables differ for each. We will go through as many as we can in this post.
List of Contents
Common
If you are using version control such as Git and created a file to store the environment variable, add the file to the .gitignore file for it to be left out when committing (Once you commit, it is a hassle to delete and commit again so I recommend doing this right after creating one).
/* .gitignore */

# .env
.env
Front-end
Angular
For Angaulr, there are two ways of creating the environment folders (if it is not started automatically).
One is to run the below command in the console
ng g environments
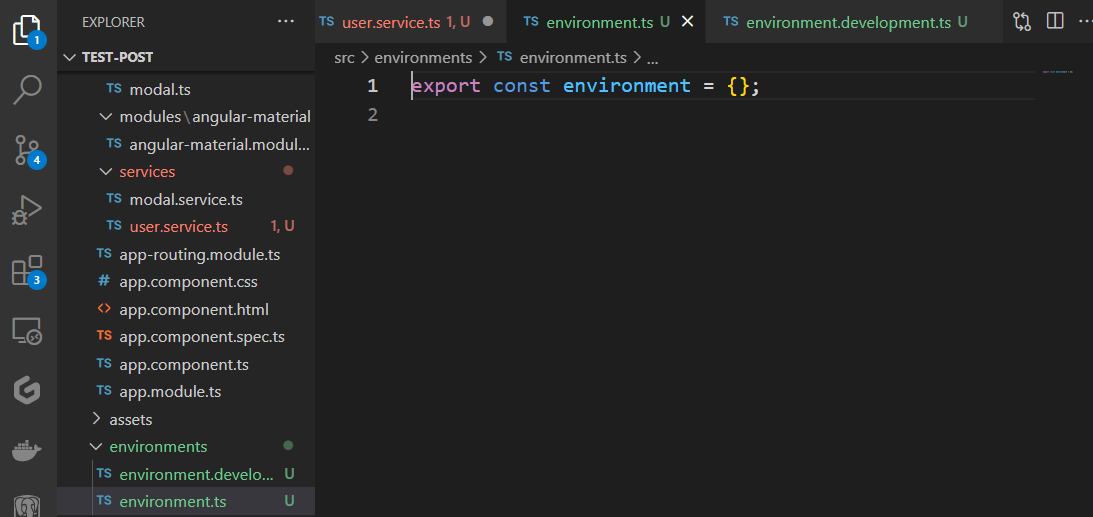
The other way is to manually add it, and create an environments folder directly under the src folder. Add two files, one for development and the other for production, with the below names.
environment.prod.tsenvironment.ts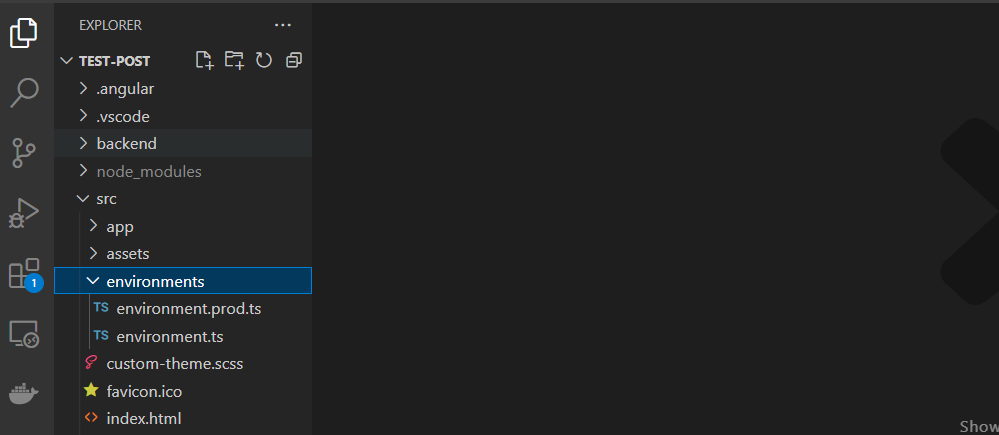
Either way, you have to fill in what is inside the files
// environment.prod.ts

export const environment = {
  production: true,
  url: 'http://localhost:3000/'
}
// environment.ts
export const environment = {
production: false,
url: 'http://localhost:3000/'
}▶ Using the Variables
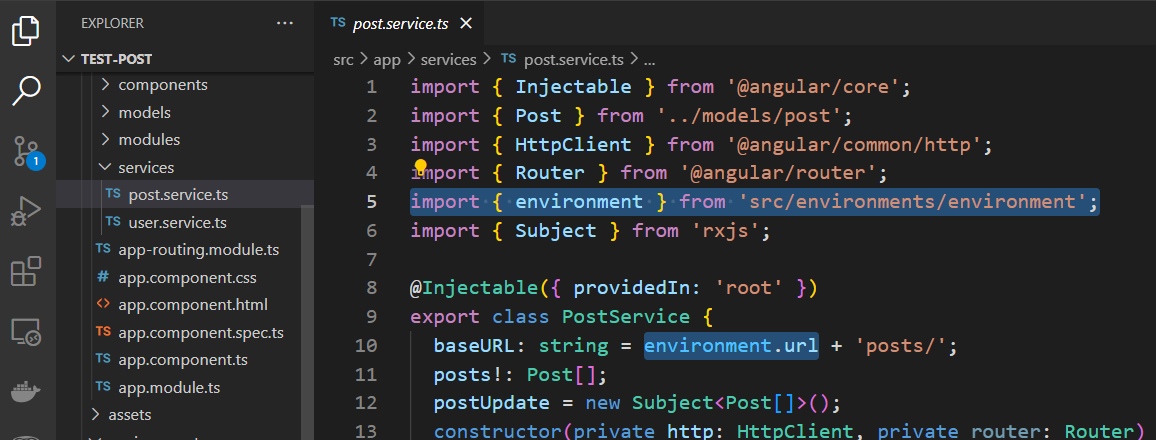
Import the environment file and use the name you set in the file to get the value.
▶ Auto Replacement
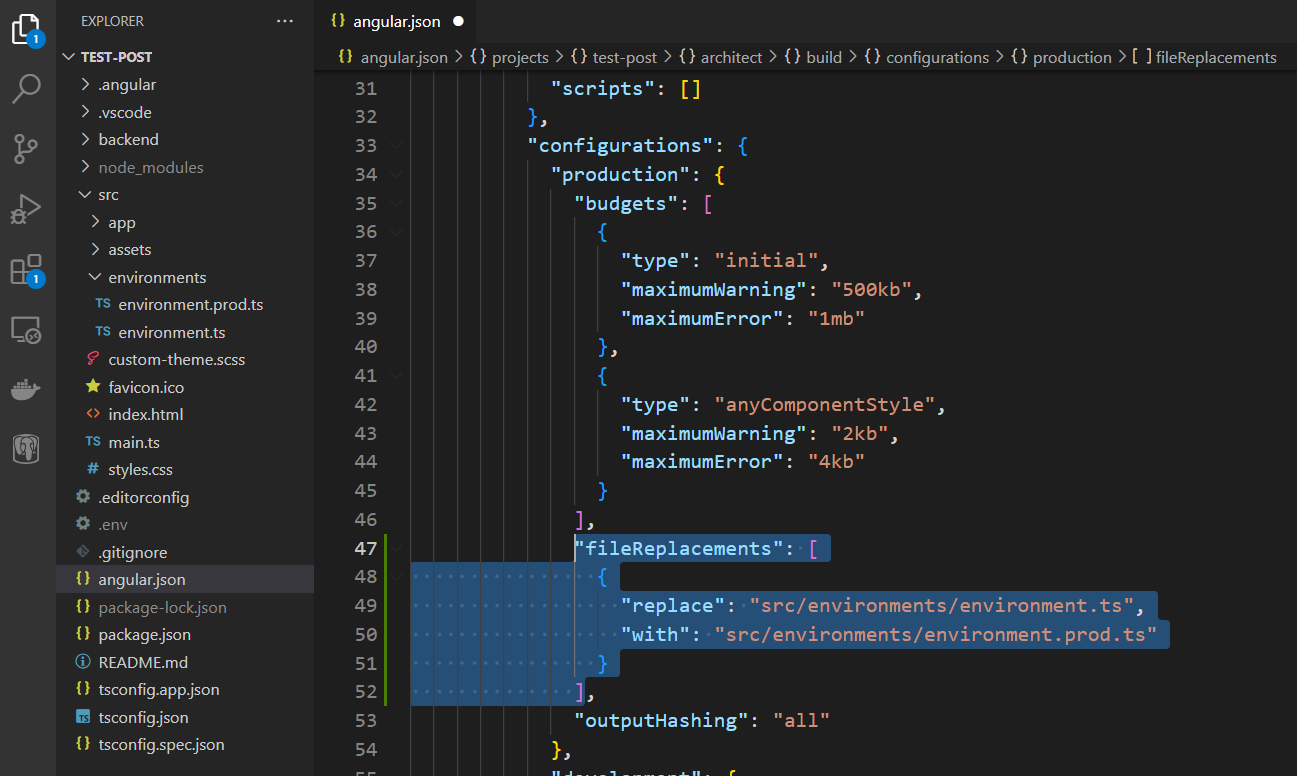
For the environment variable to be automatically replaced when deploying, we need to add a configuration code as shown below in the angular.json file.
"fileReplacements": [
  {
    "replace": "src/environments/environment.ts",
    "with": "src/environments/environment.prod.ts"
  }
],
React
Create a file called .env on the root folder. And set the variables inside the file. The name must start with 'REACT_APP_'
/* .env */

REACT_APP_<name> = "http://localhost:whatever"
▶ Using the Variables
The variables we created are stored in the environment and to use them we have to call the environment and then the name.
process.env.<name>
Back-end
Node.js
Create a file called .env on the root folder. And set the variables inside the file. The conversion is to use upper letters, words separated by underbars.
/* .env */

MG_LINK = "http://localhost:whatever"
▶ Using the Variables
To use the variable inside the .env file, we need a package. Open the console and run the command below.
npm i dotenv
In the server file, import the package and configure it as shown below.
/* app.js */

require("dotenv").config();
You can call the variable by using the variable name after 'process.env'.
/* config/mongo-db.js */

const mongoose = require("mongoose");

exports.mongoDB = () => {
  mongoose
  .connect(process.env.MG_LINK)
  .then(() => console.log("mongodb connected"))
  .catch(() => console.log("mongodb connection failed"));
}
.NET API
In the API folder, there are two configuration files. We can use these to set environment variables.
appsetting.jsonappsetting.Development.json
▶ Using the Variables
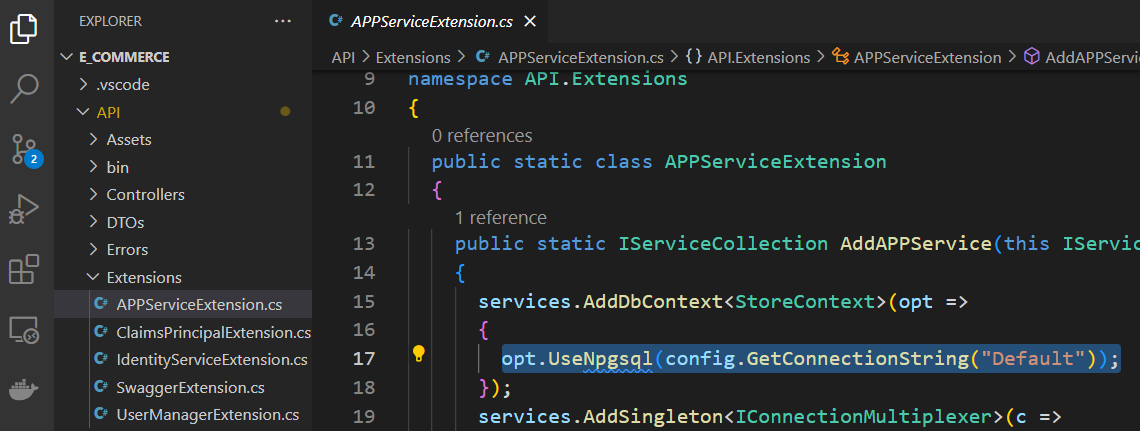
There are many ways to call the environment variables in .NET.
When you set the variable as a connection string, we can use the method to get the connection string with the key inside the connection string as a parameter.
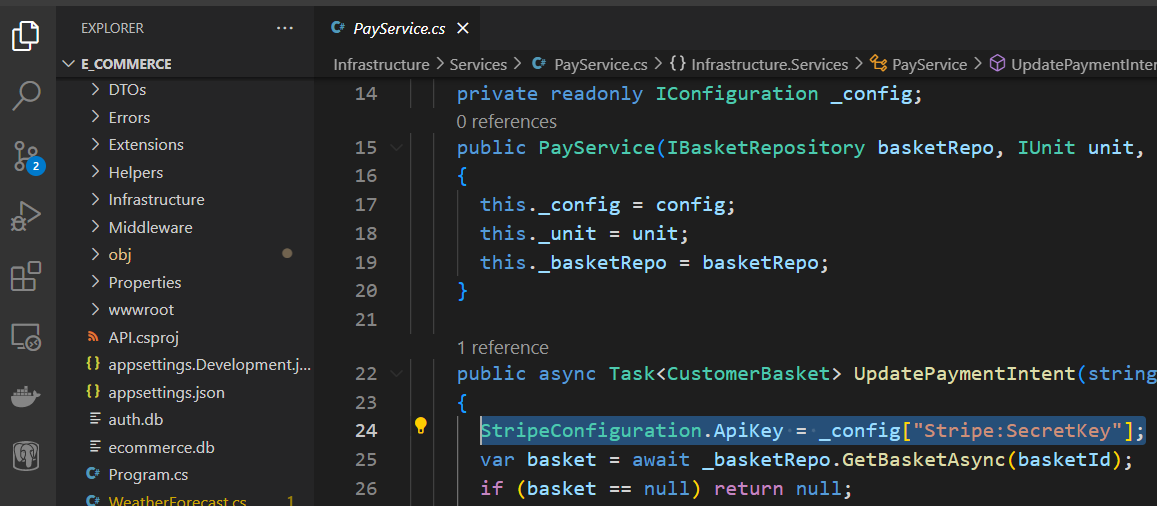
If there is no provided variable name as the connection string, we have to use the IConfiguration interface. Use a colon ':' to specify the sub-keys
Spring Boot
Spring boot uses the application.properties file to add environment variables (No limitation on the numbers and naming)

To use the variable use the syntax shown below
${<varName>}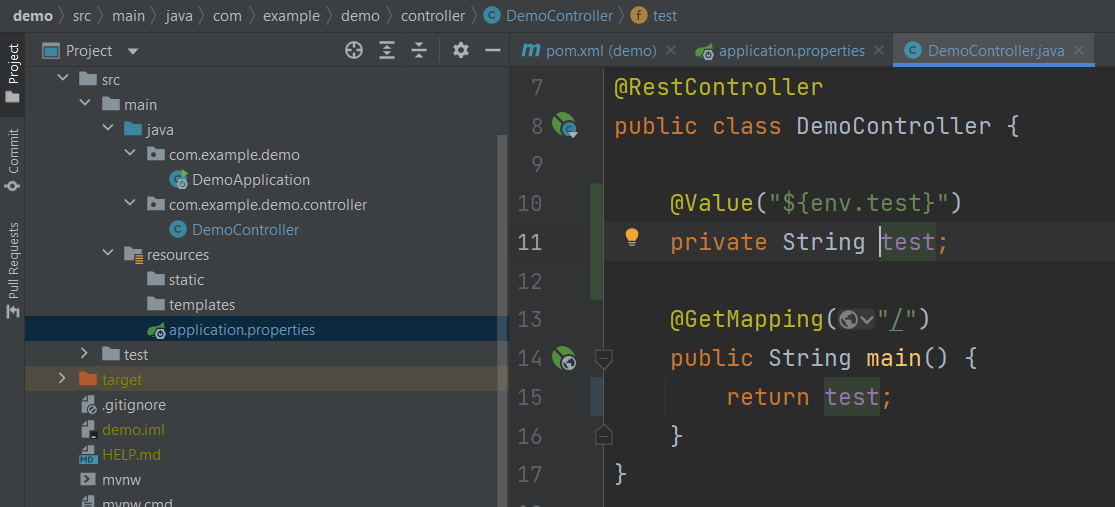

In this writing, we have seen how we can use environment variables with many different tools.
'Web Development Tips' 카테고리의 다른 글
| Logistics Delivery Status (Lotte, Post Office) (0) | 2023.12.19 |
|---|---|
| Adding Open With a Program (0) | 2023.09.01 |
| Deprecated (12) | 2023.07.12 |
| Payment Service - Stripe (1) | 2023.05.25 |
| Asynchronous VS Synchronous (1) | 2023.03.27 |


