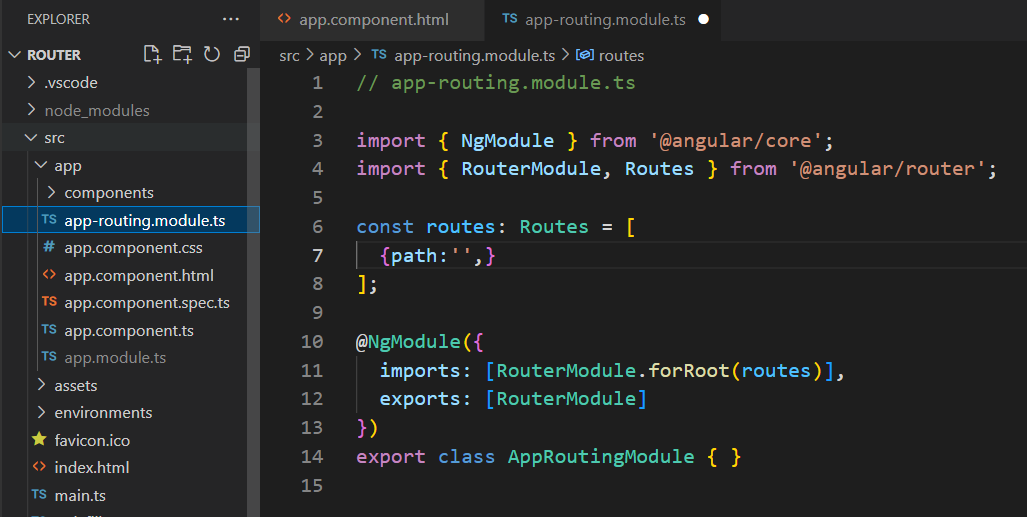
앵귤러는 싱글페이지 애플리케이션으로 URL경로가 바뀌지 않는데요. 하지만 앱의 구조상 페이지 분리가 필요할 때도 있습니다. 앵귤러 라우팅은 이러한 기능을 담당하는 모듈로 사용법을 알아보겠습니다.
모듈생성
라우팅을 사용하기 위해서는 라우터를 만들어야 하는데요. 라우팅을 위한 모듈을 따로 만드는 것을 권장합니다. 해당 모듈은 최초 애플리케이션을 만들 때 라우팅을 사용할 건지 물어보는데 이때 'y'를 선택하면 자동 생성됩니다 (추후 따로 생성하는 것도 물론 가능합니다).


만약, no를 선택한 경우 아래 커멘드를 통해 추가할 수 있습니다.
ng new my-app --routing라우터모듈은 아래와 같이 AppModule에 자동으로 등록됩니다. 모듈은 등록된 순서대로 위에서부터 순차적으로 발동되기 때문에 AppRoutingModule를 가장 아래 위치시키는 것이 좋습니다.
import { BrowserModule } from '@angular/platform-browser';
import { NgModule } from '@angular/core';
import { AppRoutingModule } from './app-routing.module'; // CLI imports AppRoutingModule
import { AppComponent } from './app.component';

@NgModule({
  declarations: [
    AppComponent
  ],
  imports: [
    BrowserModule,
    AppRoutingModule // CLI adds AppRoutingModule to the AppModule's imports array
  ],
  providers: [],
  bootstrap: [AppComponent]
})
export class AppModule { }
라우팅 사용하기
생성된 라우팅 모듈을 활용하여 경로를 각 페이지 별 경로를 설정해 보겠습니다.
페이지 간 이동을 묘사하기 위해 아래와 같이 컴포넌트를 생성합니다.
ng g c components/nav
ng g c components/home
ng g c components/post
ng g c components/about
ng g c components/not-found
먼저, 라우팅 모듈의 Routes 배열에 각 경로를 객체의 형태로 추가합니다. 모듈처럼 경로도 위에서부터 아래로 내려가면서 일치하는 처음 경로로 유입되므로 세부적인 경로가 위에 위치하는 것이 좋습니다. 또, 'path'에 경로 추가 할 때 루트에 '/'는 생략합니다.
// app-routing.module.ts

import { NgModule } from '@angular/core';
import { RouterModule, Routes } from '@angular/router';
import { AboutComponent } from './components/about/about.component';
import { HomeComponent } from './components/home/home.component';
import { NotFoundComponent } from './components/not-found/not-found.component';
import { PostComponent } from './components/post/post.component';

const routes: Routes = [
  {path:'post', component: PostComponent},
  {path:'about', component: AboutComponent},
  {path:'', component: HomeComponent},
  {path:'**', component: NotFoundComponent},
];

@NgModule({
  imports: [RouterModule.forRoot(routes)],
  exports: [RouterModule]
})
export class AppRoutingModule { }
최고 상위 모듈인 앱 모듈에 라우터 아웃렛을 태그를 설치합니다 (라우팅 모듈에 설정한 경로와 일치하는 컴포넌트를 표시하는 역할).
<!-- app.component.html -->

<app-nav></app-nav>

<main>
  <router-outlet></router-outlet>
</main>
이렇게 라우팅모듈설정을 완료하고 아웃렛을 추가하면 해당경로를 통한 페이지 변경은 완성됩니다.


라우팅 활용하기
메뉴선택을 통해 화면이동이 가능하도록 하기 위해 내비게이션 컴포넌트에 링크를 설정합니다. 이때, href 속성 대신 routerLink 속성을 사용합니다.
<!-- nav.component.html -->

<nav style="width: 100%; display: flex; align-items: center; list-style: none; justify-content: space-around; font-size: 2rem;">
  <h1>
    <a style="text-decoration: none;" routerLink="/">
      Home
    </a>
  </h1>
  <li>
    <a style="cursor:pointer; text-decoration: none;" routerLink="/post">Post</a>
  </li>
  <li>
    <a style="cursor:pointer; text-decoration: none;" routerLink="/about">About</a>
  </li>
</nav>

추가기능 사용하기
활성화된 메뉴 표시효과
앵귤러 라이브러리 - Angular Router - 활성화된 링크 표시
jin-co.tistory.com
라우터 정보
앵귤러 라우터는 사용자가 페이지 이동을 할 때 부가정보를 같이 전송하는데요. 필요한 정보를 가져오는데 Router, ActivatedRoute, ParamMap을 사용합니다.
Router
Angular
angular.io
ActivatedRoute
Angular
angular.io
ParamMap
Angular
angular.io
소스코드
https://github.com/jin-co/web-mobile/tree/master/Angular/cheat-sheet/router
GitHub - jin-co/web-mobile
Contribute to jin-co/web-mobile development by creating an account on GitHub.
github.com
참고
Angular
angular.io
'프론트엔드 > 앵귤러' 카테고리의 다른 글
| 앵귤러 라이브러리 - 앵귤러 HTTP클라이언트 (0) | 2022.12.22 |
|---|---|
| 앵귤러 라이브러리 - Angular Forms (0) | 2022.12.22 |
| 앵귤러 라이브러리 (0) | 2022.12.21 |
| 어헤드 오브 타임 컴파일러 작동원리 (0) | 2022.12.21 |
| 앵귤러 콤파일러 저스트 인 타임 VS 어헤드 오브 타임 (0) | 2022.12.20 |


