
완성된 코드
영문으로 변경하기 코드
▶ 영문 포스트
<script>
  setTimeout(() => {
    if (document.querySelector('h1')) {
      document.querySelector('h1').innerText = 'JIN-CO DEVLOG'
    }

    if (document.querySelector('em.txt_state')) {
      document.querySelector('em.txt_state').innerText = 'Subscribe'
    }

    if (document.querySelector('.tags h2')) {
      document.querySelector('.tags h2').innerText = 'Tags'
    }

    if (document.querySelector('.comment-form [name="name"]')) {
      document.querySelector('.comment-form [name="name"]').placeholder = 'Name'
    }

    if (document.querySelector('.comment-form [name="password"]')) {
      document.querySelector('.comment-form [name="password"]').placeholder = 'Password'
    }

    if (document.querySelector('.comment-form [name="comment"]')) {
      document.querySelector('.comment-form [name="comment"]').placeholder = 'I appreciate your comment'
    }

    if (document.querySelector('.submit button')) {
      document.querySelector('.submit button').innerText = 'Post'
    }

    if (document.querySelector('#footer .admin')) {
      document.querySelector('#footer .admin').innerText = 'Admin'
    }

    if (document.querySelectorAll('.post-meta > span')[2]) {
      document.querySelectorAll('.post-meta > span')[2].querySelector('a').innerText = 'Edit'
    }

    if (document.querySelectorAll('.post-meta > span')[3]) {
      document.querySelectorAll('.post-meta > span')[3].querySelector('a').innerText = 'Delete'
    }

    if (document.querySelector(".uoc-icon span.txt_like.uoc-count")) {
      document.querySelector(".uoc-icon span.txt_like.uoc-count").innerText = 'Like'
    }

    if (document.querySelectorAll('.tt_category .link_tit')) {
      document.querySelectorAll('.tt_category .link_tit').innerText = 'All Category'
    }

    document.querySelector("head > title").innerText = document.querySelector("head > title").innerText.replace('웹 개발 이것저것', 'JIN-CO DEVLOG')
    document.querySelector('html').lang = 'en'
  }, 100);
</script>


<style>
  .category_list>li:nth-of-type(even) {
    display: inherit;
  }
</style>

<style>
  .category_list>li:nth-of-type(odd) {
    display: none;
  }
</style>
공통 스타일 추가
▶ 스킨 편집 (CSS)
.category_list>li:nth-of-type(even) {
  display: none;
}
언어변경하기 버튼
▶ 국문 포스트
<style>
  .lan-box {
    display: flex;
    height: 50px;
    width: 180px;
    gap: 5px;
    margin-top: 10px;
    margin-left: auto;
    z-index: 15;
  }

  .lan-box a {
    width: 50px;
    flex-grow: 1;
    display: flex;
    align-items: center;
    justify-content: center;
    border: none;
    cursor: pointer;
    border-radius: 5px;
    box-shadow: 1px 1px 1px 0 rgba(0, 0, 0, .3);
  }

  .lan-box a:active {
    transform: scale(.97);
  }

  .lan-box a.disabled {
    opacity: .2;
  }

  .lan-box a.disabled:active {
    transform: scale(1);
  }

  .lan-box a {
    text-decoration: none;
  }

  .lan-box button {
    color: #fff;
  }
</style>

<script>
  const multiLanguageBox = document.createElement('div')
  multiLanguageBox.className = 'lan-box'
  multiLanguageBox.innerHTML = `
    <a class="lan-kr-btn disabled" style="background-color: rgb(203, 37, 37, .8);">
      <button>한글</button>
    </a>

    <a href="https://jin-co.tistory.com/190" class="lan-en-btn" style="background-color: rgb(61, 61, 233, .8);">
      <button>EN</button>
    </a>
  `
  if (window.location.href.includes('com/m/')) {
    multiLanguageBox.style.top = '180px'
    document.querySelector("#mainContent > div.blogview_tit").appendChild(multiLanguageBox)
  } else {
    document.querySelector('#content > div > div.hgroup').appendChild(multiLanguageBox)
  }
</script>
▶ 영문 포스트
<style>
.lan-box {
display: flex;
height: 50px;
width: 180px;
gap: 5px;
margin-top: 10px;
margin-left: auto;
z-index: 15;
}
.lan-box a {
width: 50px;
flex-grow: 1;
display: flex;
align-items: center;
justify-content: center;
border: none;
cursor: pointer;
border-radius: 5px;
box-shadow: 1px 1px 1px 0 rgba(0, 0, 0, .3);
}
.lan-box a:active {
transform: scale(.97);
}
.lan-box a.disabled {
opacity: .2;
}
.lan-box a.disabled:active {
transform: scale(1);
}
.lan-box a {
text-decoration: none;
}
.lan-box button {
color: #fff;
}
</style>
<script>
const multiLanguageBox = document.createElement('div')
multiLanguageBox.className = 'lan-box'
multiLanguageBox.innerHTML = `
<a href="https://jin-co.tistory.com/190" class="lan-kr-btn" style="background-color: rgb(203, 37, 37, .8);">
<button>한글</button>
</a>
<a class="lan-en-btn disabled" style="background-color: rgb(61, 61, 233, .8);">
<button>EN</button>
</a>
`
if (window.location.href.includes('com/m/')) {
multiLanguageBox.style.top = '180px'
document.querySelector("#mainContent > div.blogview_tit").appendChild(multiLanguageBox)
} else {
document.querySelector('#content > div > div.hgroup').appendChild(multiLanguageBox)
}
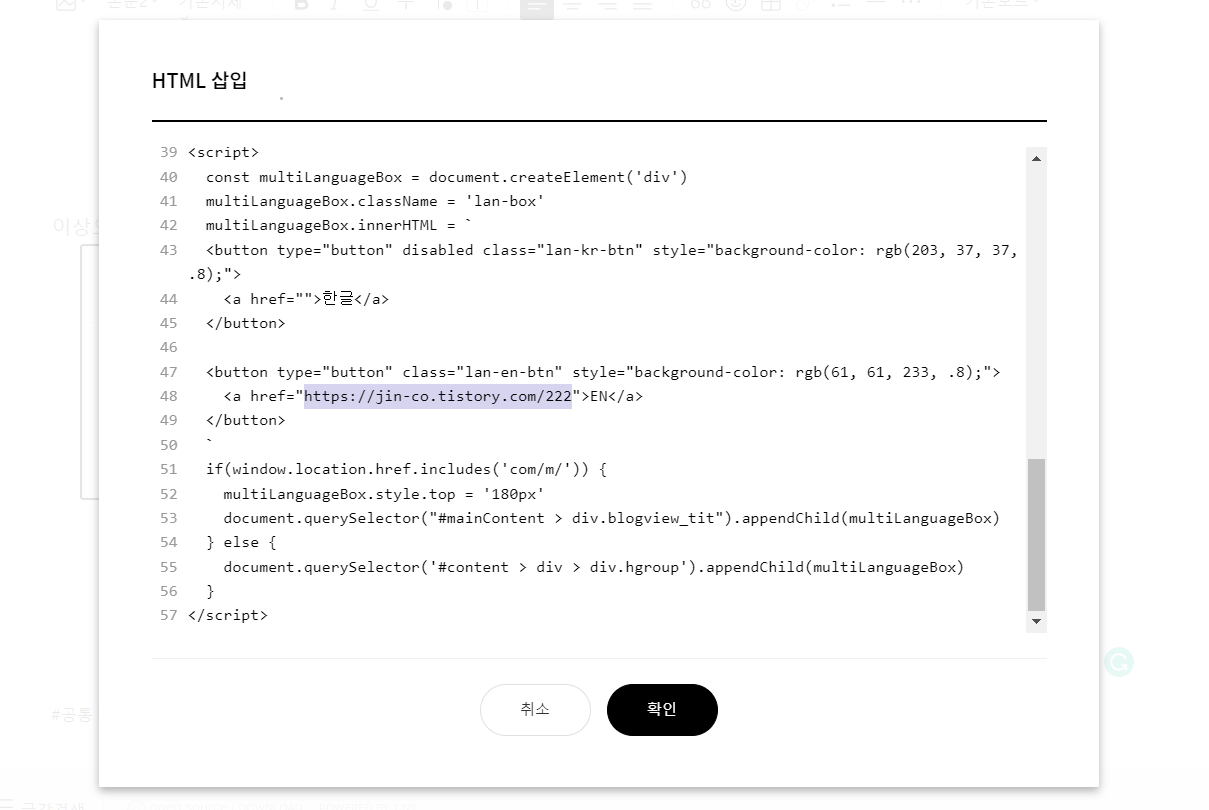
</script>※ 다국어 블로그 이동링크는 포스트마다 달라지기 때문에 아래처럼 포스트를 생성할 때마다 수동을 변경해 주어야 합니다.
배경
티스토리와 더불어 미디엄에서 같은 내용으로 영문 블로그를 같이 운영하던 중 점차 영문 쪽 블로그에 관리가 소홀해지는 것을 느꼈습니다. 이유는 플랫폼 기능차이에서 오는 형식의 차이로 한 플랫폼에서 작성한 블로그를 다른 플랫폼으로 옮길 때 형식의 수정이 필요하다는 점과 블로그의 수가 늘면서 어떤 포스트가 양쪽 모두에 업로드되었는지 추적이 힘들어졌기 다는 점입니다. 두 플랫폼
모두 제공되는 다국어 기능이 없고, 티스토리가 관리나 기능면에서 미디엄보다 났다고 판단해서 티스토리를 활용하여 다국어 블로그를 만들기로 결정하였습니다.
티스토리에서 제공되는 감안 하여 가능한 옵션을 고려해 보니 1. 따로 영문블로그를 만드는 것 2. 하나의 블로그에 영문 게시물을 만들고 UI만 바꿔주는 방법이 떠오르더군요. 따로 영문블로그를
만들면 메뉴, 타이틀 등 모두 구분이 가능하여 깔끔하긴 하지만 사이트 트래픽을 고려했을 때 하나의 블로그로 관리하는 것이 유리하고 의지함양도 될 듯해서 후자로 결정했습니다.
작업구상
먼저, 영문으로 된 블로그 하나를 작성 후 수정해야 될 부분을 살펴보니 사용 중인 'Poster' 스킨을 기준으로 크게 타이틀,

풋터 문구,

마지막으로 메뉴가 있더군요.
구현
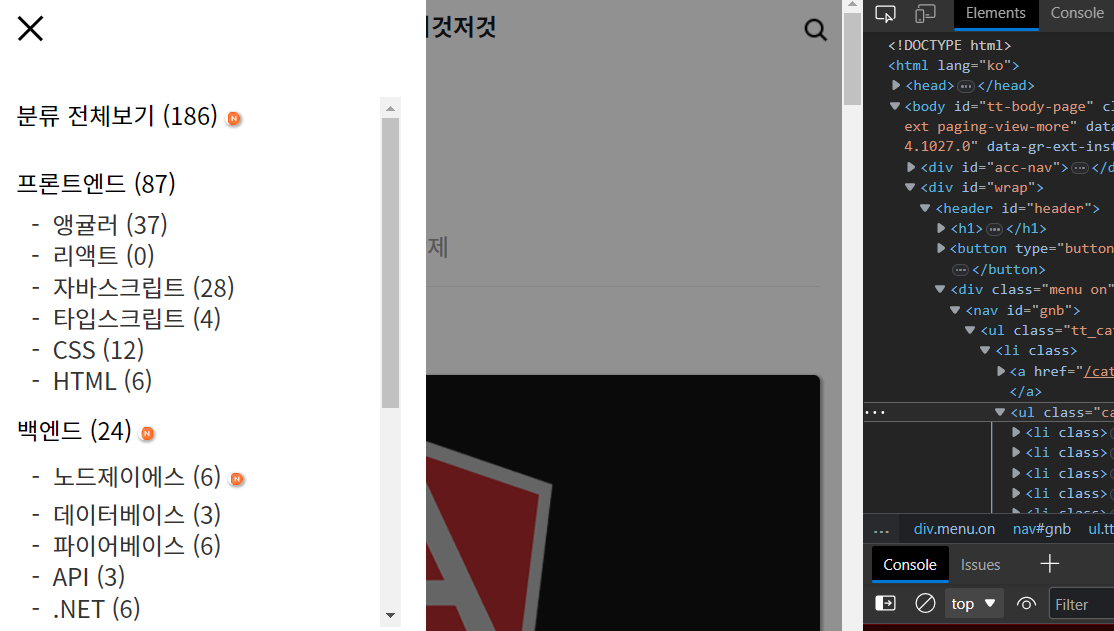
영문블로그 관련 카테고리 제작부터 들어갔습니다. 관리자 페이지에서 카테고리로 들어가 한국어 블로그 메뉴와 같은 형식으로 영문 블로그를 만들었습니다. 같은 내용의 카테고리가 붙어있는 게 좋다고 판단하여 한국어 블로그 카테고리 1번과 영문 카테고리 1번을 나란히 두는 방식으로 정리하였습니다.

블로그에 맞게 텍스트를 바꾸는 작업은 티스토리에서 제공하는 강력한 기능인 HTML블록을 사용하기로 하고

▶ 텍스트 수정
수정이 필요한 텍스트의 요소를 추려보니 아래와 같더군요.
document.querySelector('h1')
document.querySelector('em.txt_state')
document.querySelector('.tags h2')
document.querySelector('.comment-form [name="name"]')
document.querySelector('.comment-form [name="password"]')
document.querySelector('.comment-form [name="comment"]')
document.querySelector('.submit button')
document.querySelector(".uoc-icon span.txt_like.uoc-count")
document.querySelector('#footer .admin')
document.querySelectorAll('.tt_category .link_tit')

// 타이틀
document.querySelector("head > title")

// 관리자 메뉴
document.querySelectorAll('.post-meta > span')[2].querySelector('a')
document.querySelectorAll('.post-meta > span')[3].querySelector('a')
관리자 메뉴는 사용자는 볼 수 없기 때문에 수정이 불필요 하지만 기분상 모두 바꾸는 걸로 하고 텍스트를 변경하는 코드를 작성했습니다.
<script>
document.querySelector('h1').innerText = 'JIN-CO BLOG'
document.querySelector('em.txt_state').innerText = 'Subscribe'
document.querySelector('.tags h2').innerText = 'Tags'
document.querySelector('.comment-form [name="name"]').placeholder = 'Name'
document.querySelector('.comment-form [name="password"]').placeholder = 'Password'
document.querySelector('.comment-form [name="comment"]').placeholder = 'I appreciate your comment'
document.querySelector('.submit button').innerText = 'Post'
document.querySelector('#footer .admin').innerText = 'Admin'
document.querySelectorAll('.post-meta > span')[2].querySelector('a').innerText = 'Edit'
document.querySelectorAll('.post-meta > span')[3].querySelector('a').innerText = 'Delete'
document.querySelector(".uoc-icon span.txt_like.uoc-count").innerText = 'Like'
document.querySelectorAll('.tt_category .link_tit').innerText = 'All Category'
document.querySelector("head > title").innerText = document.querySelector("head > title").innerText.replace('웹 개발 이것저것', 'JIN-CO DEVLOG')
</script>
문제는 돔에 없는 요소를 호출 시 에러가 발생하고 이는 다음 코드에 영향을 주기 때문에
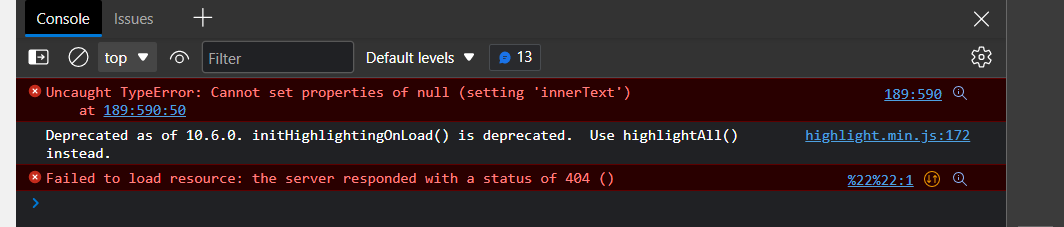
해당 에러 처리를 위해 if문을 추가한 뒤
<script>
if(document.querySelector('h1')) {
  document.querySelector('h1').innerText = 'JIN-CO BLOG'
}
</script>
구현을 하여도 일부 요소들의 값이 변하지 않는 것을 발견. 이는 돔요소의 준비상태와 관련이 있다고 판단하고 시간지연 기능을 추가 후
<script>
setTimeout(() => {
if(document.querySelector('h1')) {
document.querySelector('h1').innerText = 'JIN-CO BLOG'
}
if(document.querySelector('em.txt_state')) {
document.querySelector('em.txt_state').innerText = 'Subscribe'
}
if(document.querySelector('.tags h2')) {
document.querySelector('.tags h2').innerText = 'Tags'
}
if(document.querySelector('.comment-form [name="name"]')) {
document.querySelector('.comment-form [name="name"]').placeholder = 'Name'
}
if(document.querySelector('.comment-form [name="password"]')) {
document.querySelector('.comment-form [name="password"]').placeholder = 'Password'
}
if(document.querySelector('.comment-form [name="comment"]')) {
document.querySelector('.comment-form [name="comment"]').placeholder = 'I appreciate your comment'
}
if(document.querySelector('.submit button')) {
document.querySelector('.submit button').innerText = 'Post'
}
if(document.querySelector('#footer .admin')) {
document.querySelector('#footer .admin').innerText = 'Admin'
}
if (document.querySelectorAll('.post-meta > span')[2]) {
document.querySelectorAll('.post-meta > span')[2].querySelector('a').innerText = 'Edit'
}
if (document.querySelectorAll('.post-meta > span')[3]) {
document.querySelectorAll('.post-meta > span')[3].querySelector('a').innerText = 'Delete'
}
if (document.querySelector(".uoc-icon span.txt_like.uoc-count")) {
document.querySelector(".uoc-icon span.txt_like.uoc-count").innerText = 'Like'
}
if (document.querySelectorAll('.tt_category .link_tit')) {
document.querySelectorAll('.tt_category .link_tit').innerText = 'All Category'
}
document.querySelector("head > title").innerText = document.querySelector("head > title").innerText.replace('웹 개발 이것저것', 'JIN-CO DEVLOG')
document.querySelector('html').lang = 'en'
}, 100)
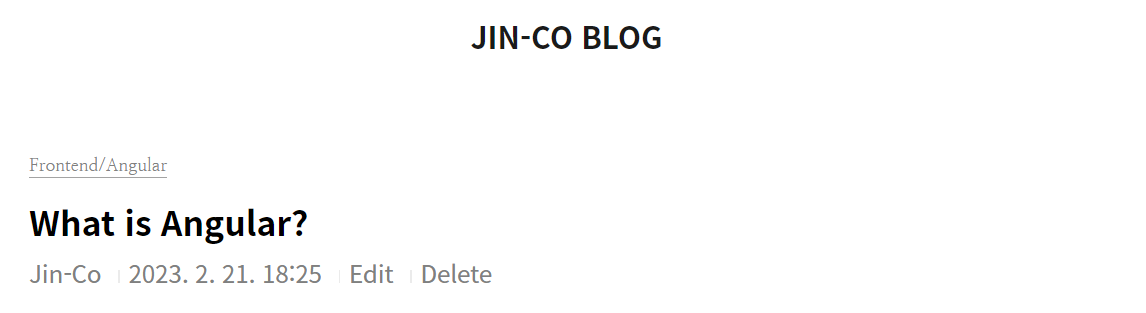
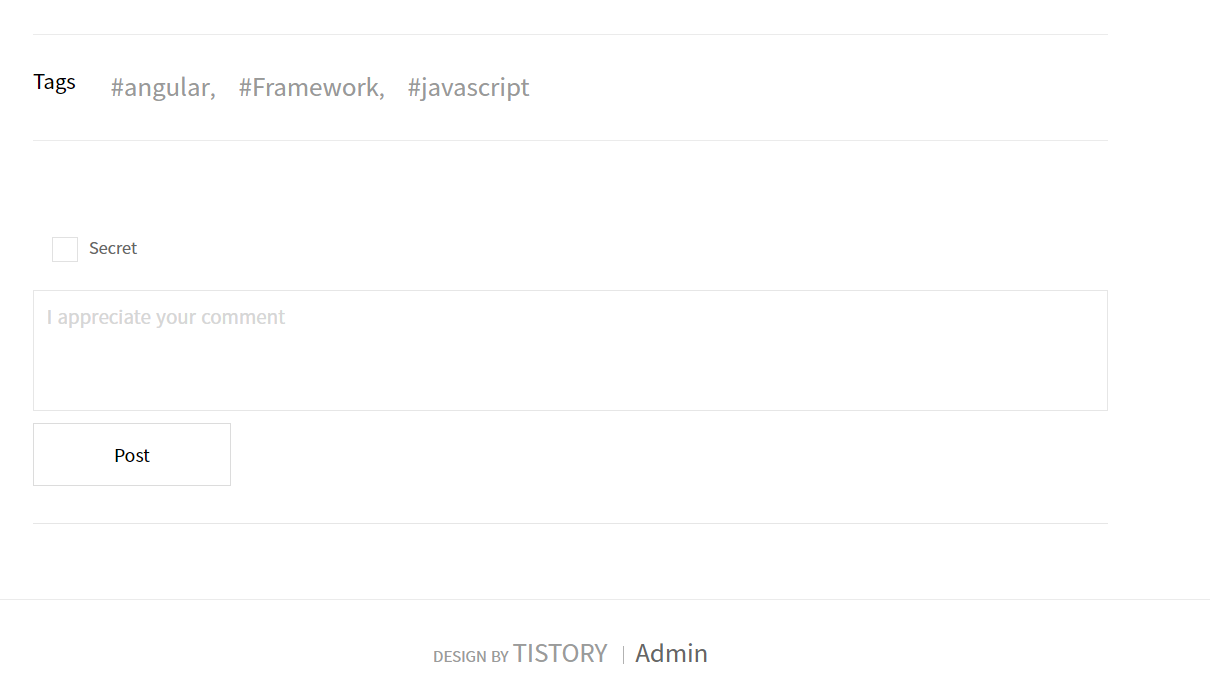
</script>해당 포스트 가장아래 (위치는 무관) HTML로 삽입결과

텍스트는 모두 대체가 되었네요!
▶ 메뉴 수정
메뉴 수정은 관리의 편의를 위해 한국어 메뉴와 영문을 카테고리 별로 묶어서 설정해 두었으므로 아래 코드를 번갈아 이용하여 각 블로그에서 숨기는 거나 표시하는 방법으로 결정하였습니다.
.category_list > li:nth-of-type(even) {
  display: none;
}
.category_list > li:nth-of-type(odd) {
display: none;
}메뉴의 경우 구현은 같은 방법으로 HTML코드 삽입으로 가능하나 기존에 작성된 한국어 블로그 포스트의 양을 고려 작업을 최소화하기 위해 먼저 블로그 전체 스킨에 영문 블로그 관련 메뉴를 없애는 스타일을 CSS파일에 삽입하고, 추가하는 영문 블로그에서 영문 메뉴를 활성화하는 방법으로 결정하였습니다.
관리자 페이지 -> '스킨편집'

CSS선택 후 영문 메뉴를 숨기는 코드 삽입

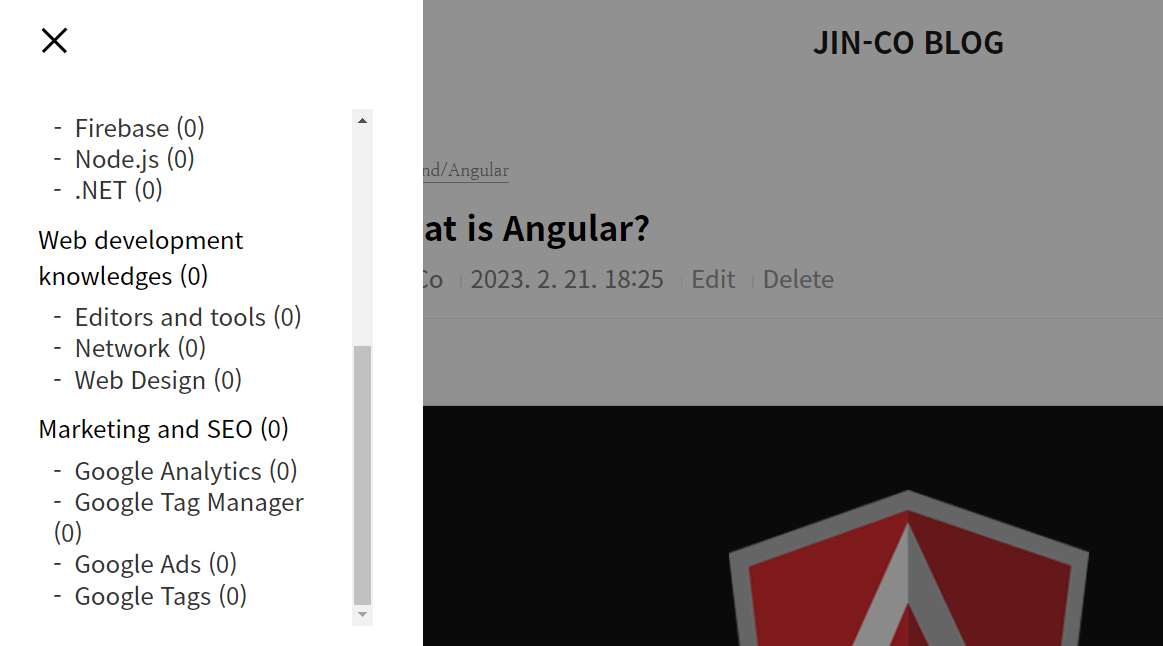
작업 결과 한국어 메뉴만 뜨는군요.

이제, 영문블로그 페이지에 HTML코드 삽입으로 아래 코드를 삽입하면
<script>
if(document.querySelector('.tt_category .link_tit')) {
document.querySelector('.tt_category .link_tit').innerText = 'All Category'
}
</script>
<style>
.category_list > li:nth-of-type(even) {
display: inherit;
}
</style>
<style>
.category_list > li:nth-of-type(odd) {
  display: none;
}
</style>메뉴도 완성되었습니다 ㅎㅎ.
언어변경하기
두 개의 포스트를 만들었기 때문에 두 포스트를 링크로 연결하는 방법으로 구현하였습니다.
▶ 국문 포스트
<style>
  .lan-box {
    display: flex;
    height: 50px;
    width: 180px;
    gap: 5px;
    margin-top: 10px;
    margin-left: auto;
    z-index: 15;
  }

  .lan-box a {
    width: 50px;
    flex-grow: 1;
    display: flex;
    align-items: center;
    justify-content: center;
    border: none;
    cursor: pointer;
    border-radius: 5px;
    box-shadow: 1px 1px 1px 0 rgba(0, 0, 0, .3);
  }

  .lan-box a:active {
    transform: scale(.97);
  }

  .lan-box a.disabled {
    opacity: .2;
  }

  .lan-box a.disabled:active {
    transform: scale(1);
  }

  .lan-box a {
    text-decoration: none;
  }

  .lan-box button {
    color: #fff;
  }
</style>

<script>
  const multiLanguageBox = document.createElement('div')
  multiLanguageBox.className = 'lan-box'
  multiLanguageBox.innerHTML = `
    <a class="lan-kr-btn disabled" style="background-color: rgb(203, 37, 37, .8);">
      <button>한글</button>
    </a>

    <a href="https://jin-co.tistory.com/190" class="lan-en-btn" style="background-color: rgb(61, 61, 233, .8);">
      <button>EN</button>
    </a>
  `
  if (window.location.href.includes('com/m/')) {
    multiLanguageBox.style.top = '180px'
    document.querySelector("#mainContent > div.blogview_tit").appendChild(multiLanguageBox)
  } else {
    document.querySelector('#content > div > div.hgroup').appendChild(multiLanguageBox)
  }
</script>
▶ 영문 포스트
<style>
  .lan-box {
    display: flex;
    height: 50px;
    width: 180px;
    gap: 5px;
    margin-top: 10px;
    margin-left: auto;
    z-index: 15;
  }

  .lan-box a {
    width: 50px;
    flex-grow: 1;
    display: flex;
    align-items: center;
    justify-content: center;
    border: none;
    cursor: pointer;
    border-radius: 5px;
    box-shadow: 1px 1px 1px 0 rgba(0, 0, 0, .3);
  }

  .lan-box a:active {
    transform: scale(.97);
  }

  .lan-box a.disabled {
    opacity: .2;
  }

  .lan-box a.disabled:active {
    transform: scale(1);
  }

  .lan-box a {
    text-decoration: none;
  }

  .lan-box button {
    color: #fff;
  }
</style>

<script>
  const multiLanguageBox = document.createElement('div')
  multiLanguageBox.className = 'lan-box'
  multiLanguageBox.innerHTML = `
    <a href="https://jin-co.tistory.com/190" class="lan-kr-btn" style="background-color: rgb(203, 37, 37, .8);">
      <button>한글</button>
    </a>

    <a class="lan-en-btn disabled" style="background-color: rgb(61, 61, 233, .8);">
      <button>EN</button>
    </a>
  `
  if (window.location.href.includes('com/m/')) {
    multiLanguageBox.style.top = '180px'
    document.querySelector("#mainContent > div.blogview_tit").appendChild(multiLanguageBox)
  } else {
    document.querySelector('#content > div > div.hgroup').appendChild(multiLanguageBox)
  }
</script>
각 코드를 해당 포스트에 HTML삽입으로 삽입하면 완료!
※ 다국어 블로그 서치 최적화
검색 엔진최적화 (다국어 블로그)
다국어블로그를 만들고 검색 엔진최적화 부분을 알아보던 중 마침 구글의 경우 동일한 콘텐츠를 여러 언어버전으로 생성한 경우 인덱싱과 검색결과를 보여줄 때 반영할 수 있는 기능이 있어 소
jin-co.tistory.com
※ 북클럽 스킨 다국어 블로그 만들기
티스토리 다국어 블로그만들기 (Book Club 스킨)
북클럽 스킨을 활용하여 더블포스팅을 통해 다국어 블로그를 만드는 방법을 보겠습니다. 완성된 코드 영문으로 변경하기 코드 ▶ 영문 포스트 언어변경하기 버튼 ▶ 국문 포스트 ▶ 영문 포스
jin-co.tistory.com
이상으로 티스토리에서 하나의 블로그에 더블포스팅으로 다국어 블로그를 만드는 법을 보았습니다.
'웹 개발 알아두기 > 티스토리' 카테고리의 다른 글
| 티스토리 다국어 블로그만들기 (Book Club 스킨) (5) | 2023.04.29 |
|---|---|
| 코드 클립보드에 복사하기 (3) | 2023.03.18 |
| 티스토리 자연스러운 페이지 로딩 (2) | 2023.03.04 |
| 티스토리 - 스타일링 (4) | 2023.01.19 |
| 티스토리 목차 링크 만들기 (0) | 2023.01.16 |


