When we create a Web API project a package called 'Swagger' is automatically added. Swagger is a tool that provides API documentation like PostMan. Whenever we run the API project it runs and shows us the endpoints and the results that each endpoint returns

List of Contents
- How Does It Work?
- Excluding Controllers
- Adding Multiple Status Responses
- Separating Swagger Extensions from the Program File
- Adding Authentication
Creating a Web API Project
How to create .NET web-API
Setting up development tools When working with .NET, we need tools to create a web application. We can download them in the link below.다. .NET | Free. Cross-platform. Open Source. (microsoft.com) .NET | Free. Cross-platform. Open Source. .NET is a develo
jin-co.tistory.com
How Does It Work?
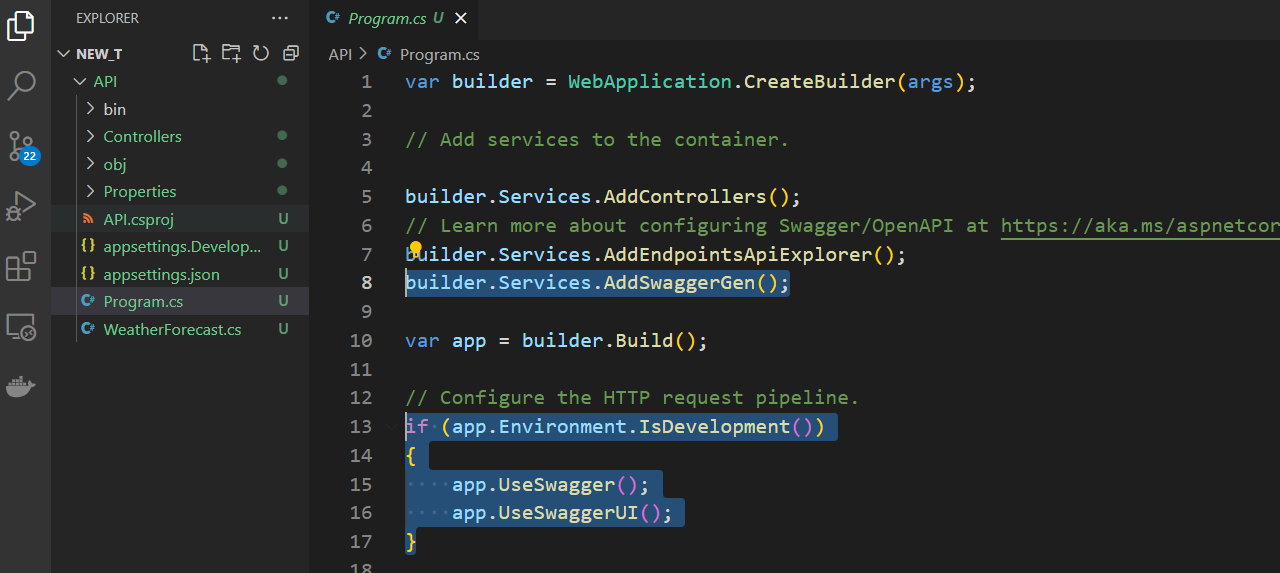
In the Program.cs file, you will see the highlighted codes below. The first line is to register the tool as a service and the second code is what runs and opens the tool with a condition that fires only in development (We can remove the condition to use the tool in the production as well)

Excluding Controllers
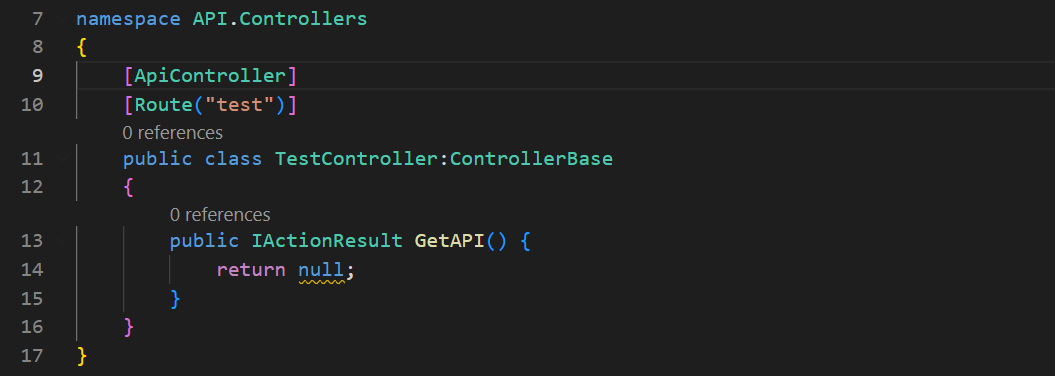
When there is a problem in an endpoint such as you did not return a response when it is expected as shown below
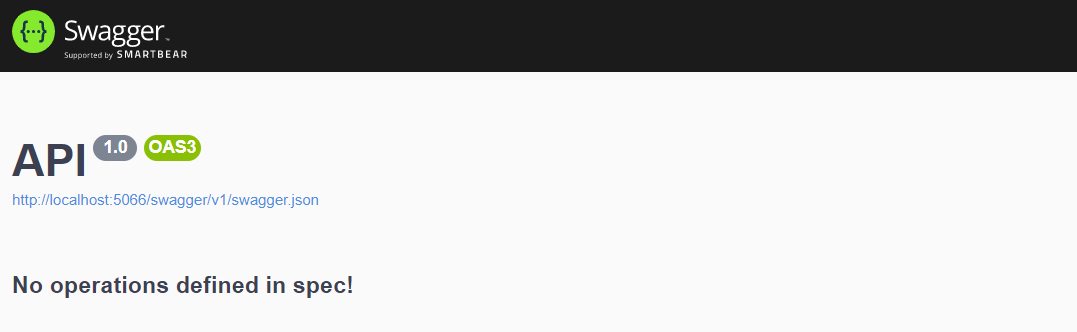
Swagger shows an error like below and we cannot see the other controllers.

Or when you just don't want to see a certain controller. We can add an option to remove controllers from the report
[ApiExplorerSettings(IgnoreApi = true)]
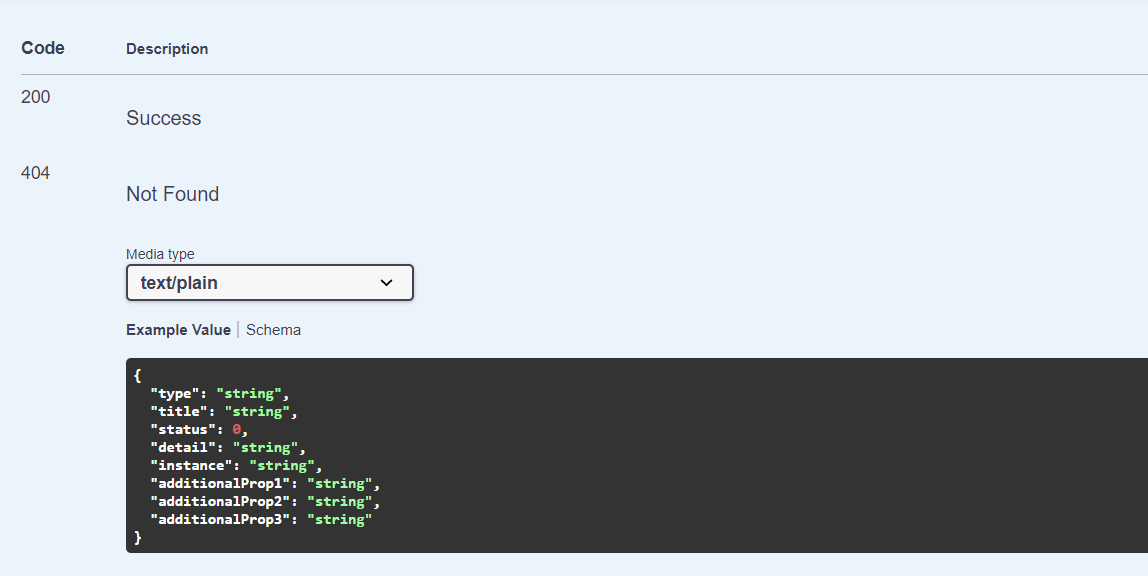
Adding Multiple Status Responses
We can also add possible status codes to an endpoint
[ProducesResponseType(StatusCodes.Status200OK)]
[ProducesResponseType(StatusCodes.Status404NotFound)]
※ If you are using a class that returns a customized response, you have to specify the type to show it properly
[ProducesResponseType(typeof(CustomAPIResponse), StatusCodes.Status404NotFound)]
Separating Swagger Extensions from the Program File
Let's create a separate extension file for the Swagger for a better organization
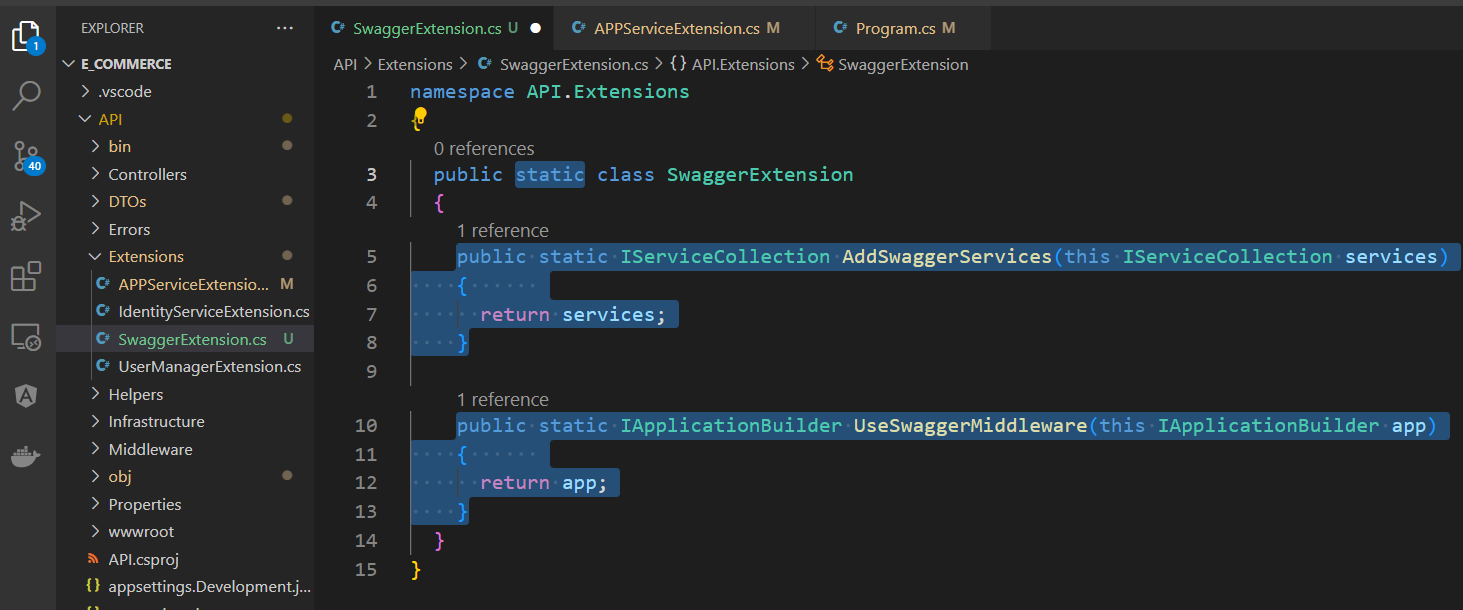
Creating an Extension Class
Create an extension class in the extension folder

Change the class to a static class and add static methods that add the service and middleware
public static IServiceCollection AddSwaggerServices(this IServiceCollection services)
{
  return services;
}

public static IApplicationBuilder UseSwaggerMiddleware(this IApplicationBuilder app)
{
  return app;
}
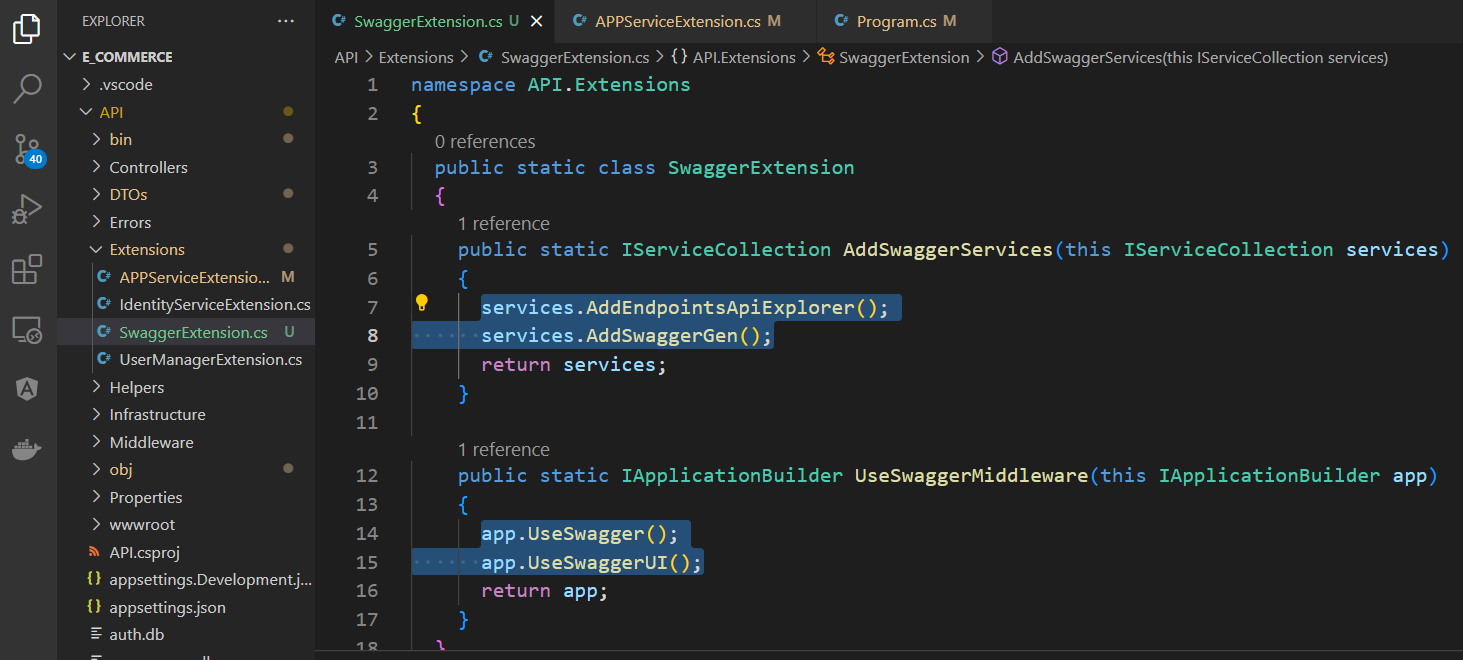
In the Program.cs file cut the service code

and middleware code for the Swagger

Paste them in each method
public static IServiceCollection AddSwaggerServices(this IServiceCollection services)
{
  services.AddEndpointsApiExplorer();
  services.AddSwaggerGen();
  return services;
}

public static IApplicationBuilder UseSwaggerMiddleware(this IApplicationBuilder app)
{
  app.UseSwagger();
  app.UseSwaggerUI();
  return app;
}
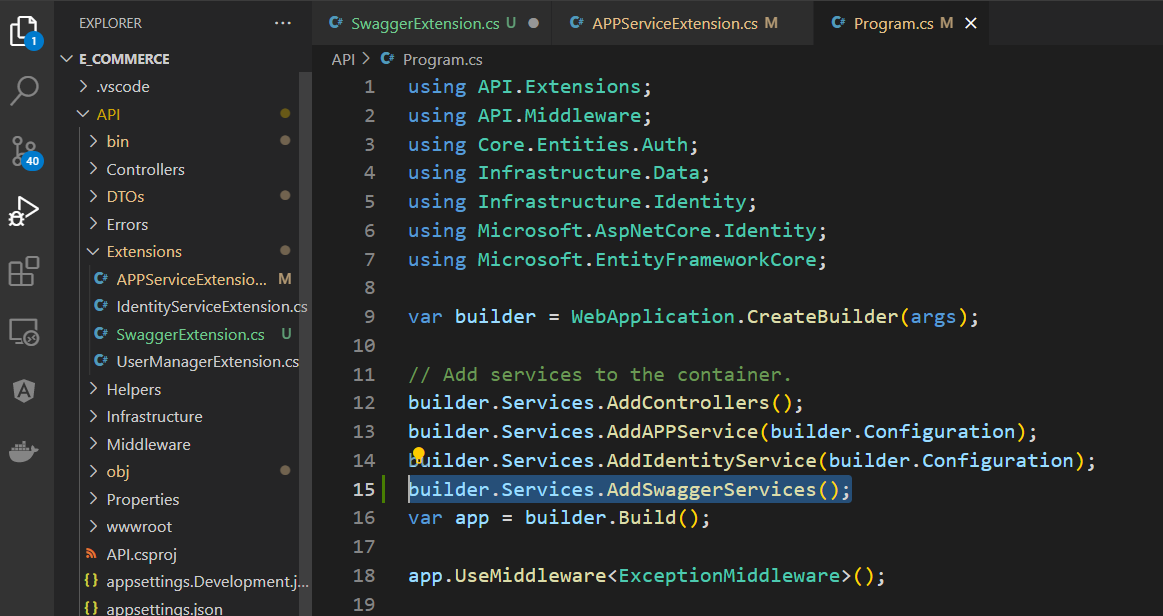
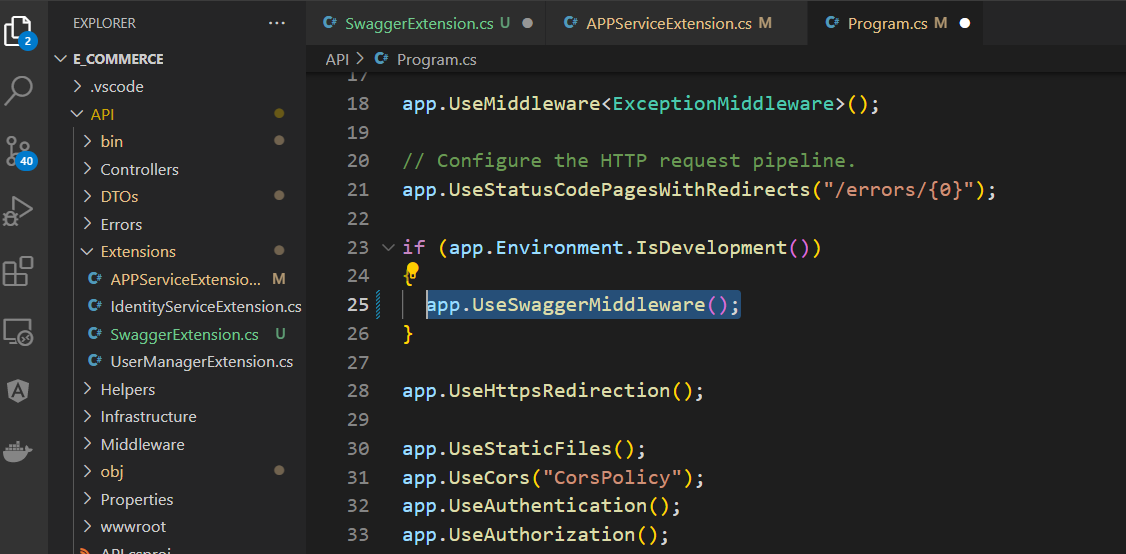
Updating the Program File
Add the service and middleware methods to the Program.cs file
Adding Authentication
When we add identity to our application, we need an additional setup to send the token on Swagger. Without the feature, we won't be able to access the endpoints that require authentication

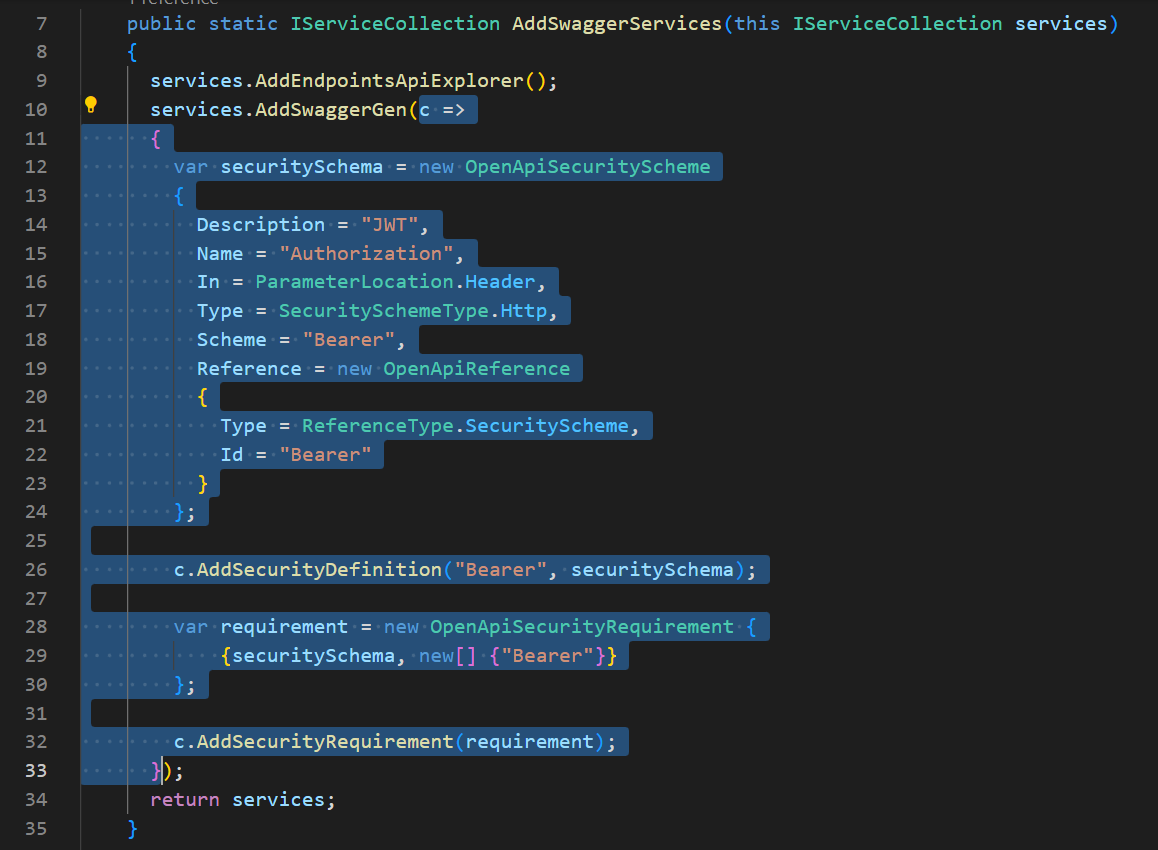
To add the option, we use 'services.AddSwaggerGen()'
services.AddSwaggerGen(c =>
{
  var securitySchema = new OpenApiSecurityScheme
  {
    Description = "JWT",
    Name = "Authorization",
    In = ParameterLocation.Header,
    Type = SecuritySchemeType.Http,
    Scheme = "Bearer",
    Reference = new OpenApiReference
    {
      Type = ReferenceType.SecurityScheme,
      Id = "Bearer"
    }
  };

  c.AddSecurityDefinition("Bearer", securitySchema);

  var requirement = new OpenApiSecurityRequirement {
    {securitySchema, new[] {"Bearer"}}
  };

  c.AddSecurityRequirement(requirement);
});
After completing the setup, run the app and you will see the 'Authorization' button added

Click and save the token you get when you log in

Make another request and you will see the data

In this writing, we got to know Swagger.
'Backend > .NET' 카테고리의 다른 글
| Generic Repository Specification Pattern - Adding Filtering (0) | 2023.04.24 |
|---|---|
| Generic Repository Specification Pattern - Adding Sorting (0) | 2023.04.24 |
| Using Static Files (0) | 2023.04.19 |
| Data Transfer Object (DTO) (0) | 2023.04.19 |
| Relational DB - Getting Data Asynchronous (0) | 2023.04.16 |


