
Firebase has many features we can capitalize on. And among them, today, we are going to check the authentication service out. One of the advantages of using the Firebase authentication is that the service already has a way to persist user data on the browser so we don't need to create a token and pass it back and forth like we would typically do with custom authentication systems.
List of Contents
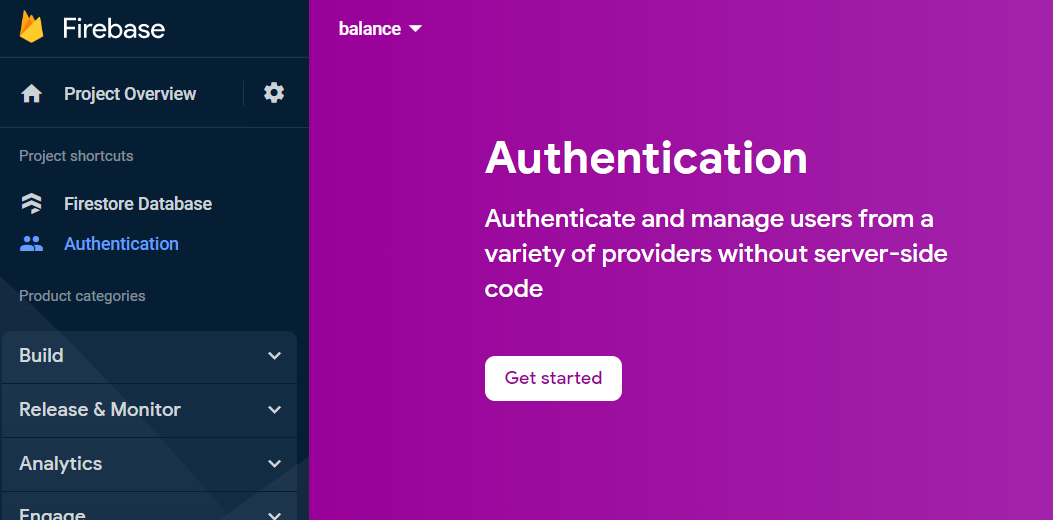
Setting up Authentication in Firebase
Select Build -> Authentication
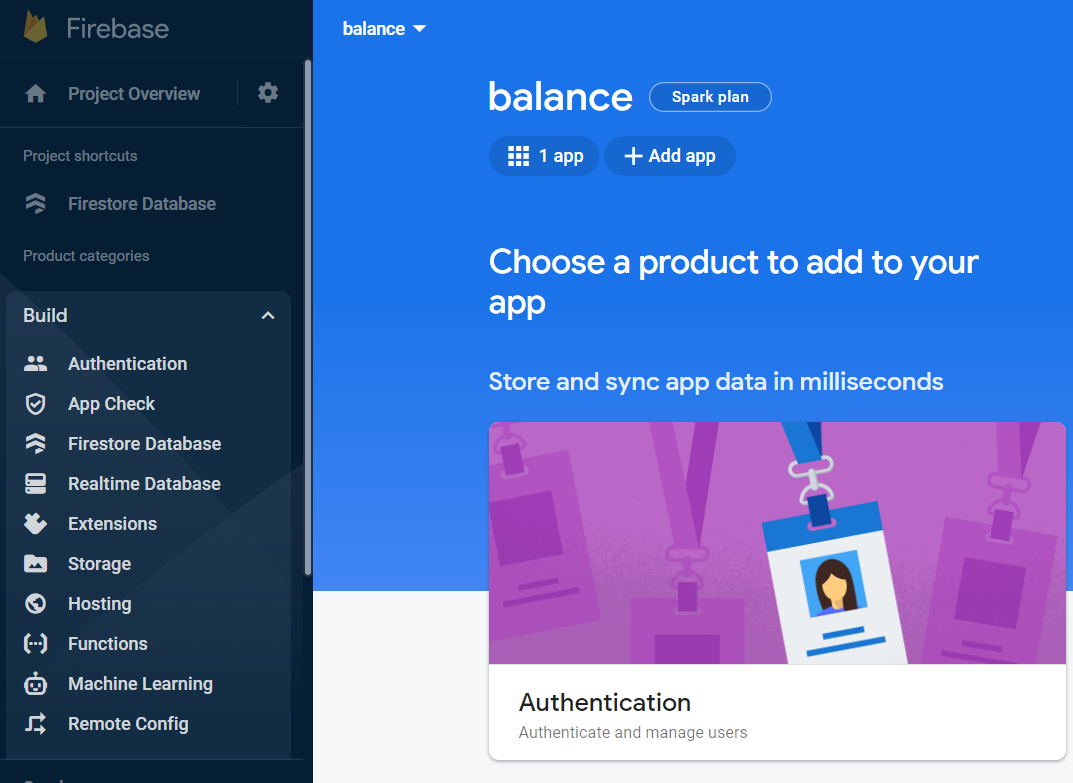
Choose Get started
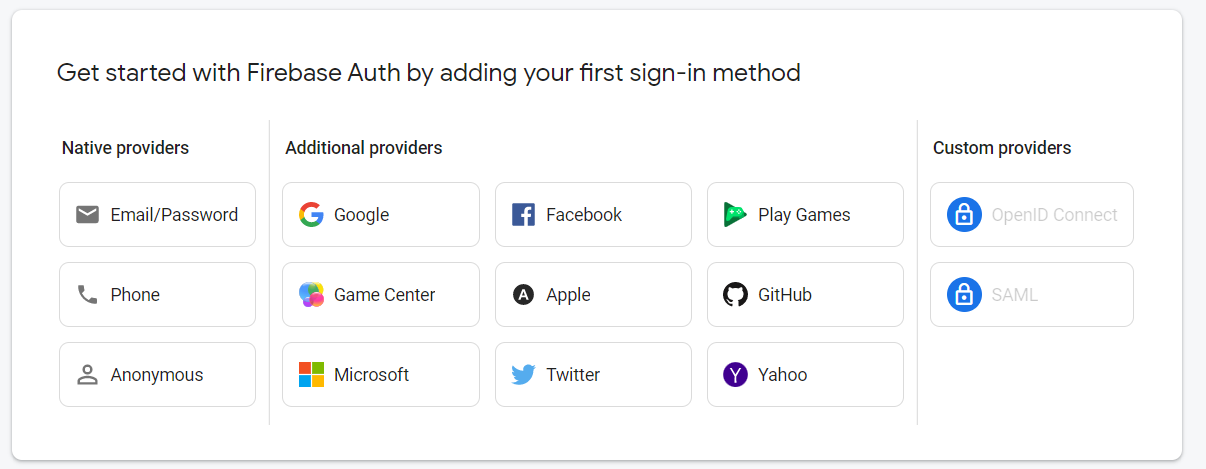
Then Email/Password
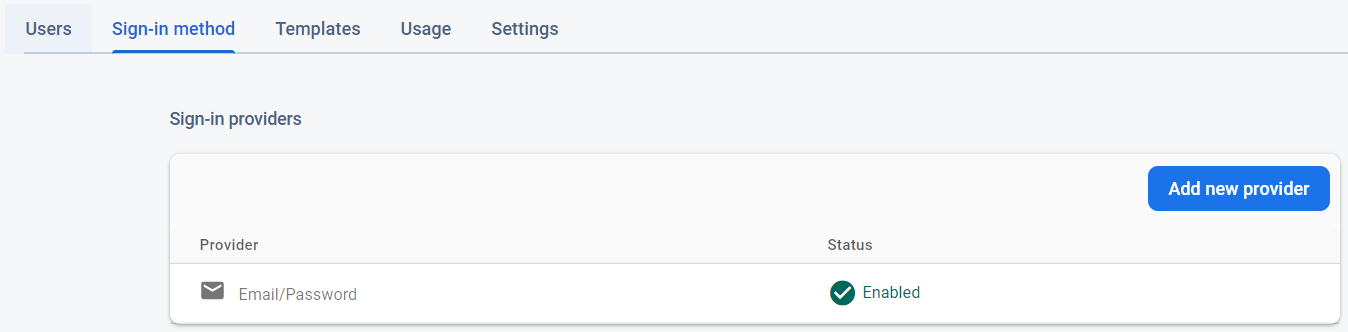
Turn the email/password option on
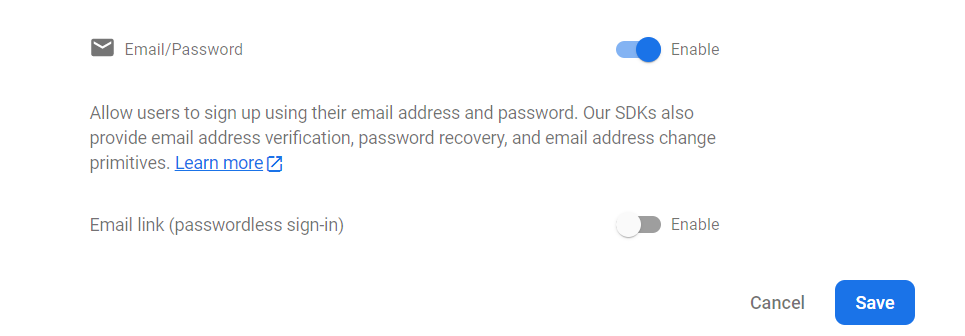
Completed!
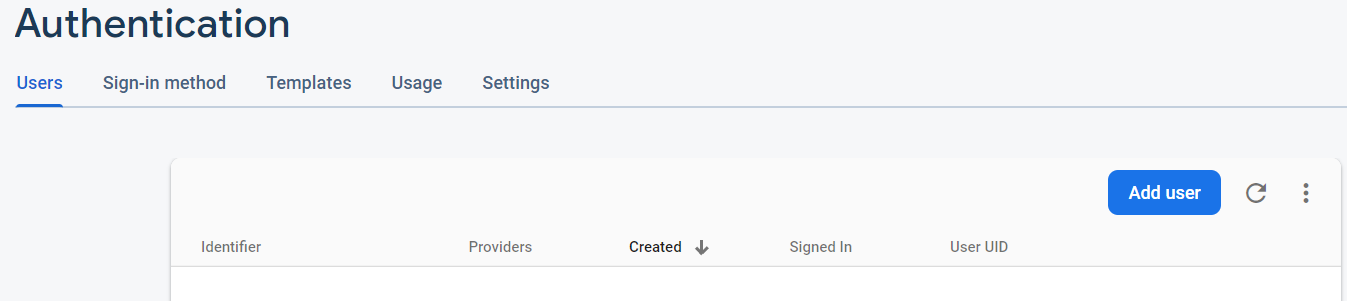
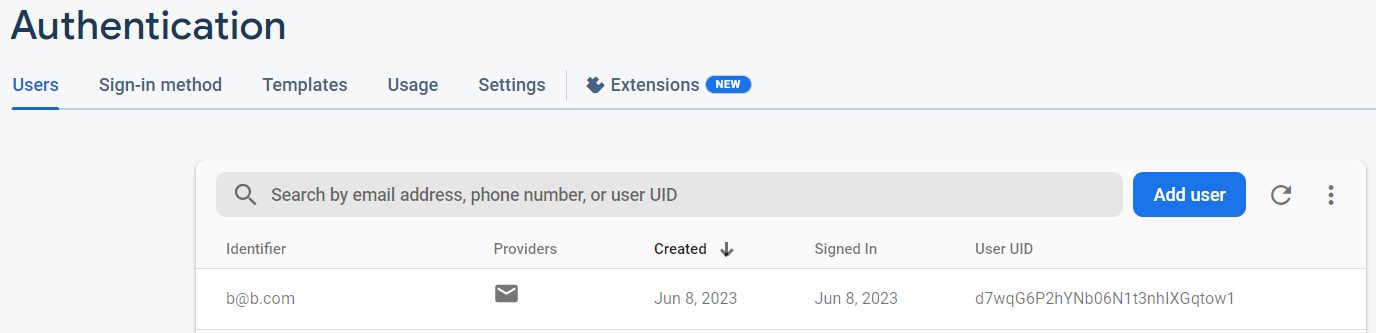
If you want some users to work with, select Users -> Add user
Enter the email, password then click add
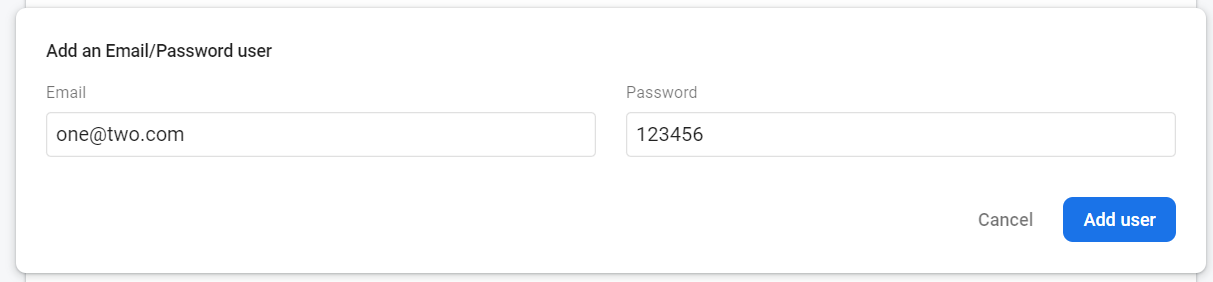
Completed!

Working with Applications
Connecting Firebase to Applications
Firebase - Connecting to Applications
Firebase is Google's backend cloud service that provides a database to store data, authentication, hosting, and so on. The main advantage of using a cloud service like this is, of course, there is no need to develop a backend (or at least can save a huge a
jin-co.tistory.com
Angular
Open the module file and add the AngularFireAuthModule
// app.module.ts

import { NgModule } from '@angular/core';
import { BrowserModule } from '@angular/platform-browser';
import { AppRoutingModule } from './app-routing.module';
import { AppComponent } from './app.component';
import { LoginComponent } from './components/auth/login/login.component';
import { AngularFireModule } from '@angular/fire/compat';
import { environment } from '../environments/environment';
import { AngularFireAuthModule } from '@angular/fire/compat/auth';

@NgModule({
  declarations: [
    AppComponent,
    LoginComponent,
  ],
  imports: [
    BrowserModule,
    AppRoutingModule,
    BrowserAnimationsModule,
    FormsModule,
    HttpClientModule,
    AngularFireModule.initializeApp(environment.firebase),
    AngularFireAuthModule, // Auth module
  ],
  providers: [

  ],
  bootstrap: [AppComponent],
})
export class AppModule {}
Create a service file (optional)
▶ Log in / Logout
.signInWithEmailAndPassword(email, password).signOut()Add the code shown below in the service file
// auth.service.ts

import { Injectable } from '@angular/core';
import { Auth, createUserWithEmailAndPassword } from '@angular/fire/auth';
import { AngularFireAuth } from '@angular/fire/compat/auth';

@Injectable({ providedIn: 'root' })
export class AuthService {
  constructor(private afa: AngularFireAuth) {}

  login(email: string, password: string) {
    this.afa.signInWithEmailAndPassword(email, password);
  }

  logout() {
    this.afa.signOut();
  }
}
In the template file, add a form
<!-- login.component.html -->

<form #form="ngForm" (submit)="onSubmit(form)">
  <mat-form-field>
    <input
      placeholder="email"
      matInput
      type="email"
      required
      name="email"
      #email="ngModel"
      ngModel
    />
  </mat-form-field>
  <mat-form-field>
    <input
      placeholder="password"
      matInput
      type="password"
      required
      name="password"
      #password="ngModel"
      ngModel
    />
  </mat-form-field>
  <button mat-raised-button>Login</button>
  <small>Not registered yet? <a routerLink="/signup">Register</a></small>
</form>
In the class file, inject the service and use the functions from it
// login.component.ts

import { Component, OnInit } from '@angular/core';
import { NgForm } from '@angular/forms';
import { Router } from '@angular/router';
import { AuthService } from 'src/app/services/auth';

@Component({
  selector: 'app-login',
  templateUrl: './login.component.html',
  styleUrls: ['./login.component.css', '../auth.style.css'],
})
export class LoginComponent implements OnInit {
  constructor(private authService: AuthService, private router: Router) {}

  ngOnInit(): void {}

  onSubmit(form: NgForm) {
    if (form.valid) {
      try {
        this.authService.login(form.value.email, form.value.password);
        this.router.navigate(['/'])
      } catch (error) {
        console.log(error);
      }
    }
    form.resetForm();
  }
}
React
▶ Register
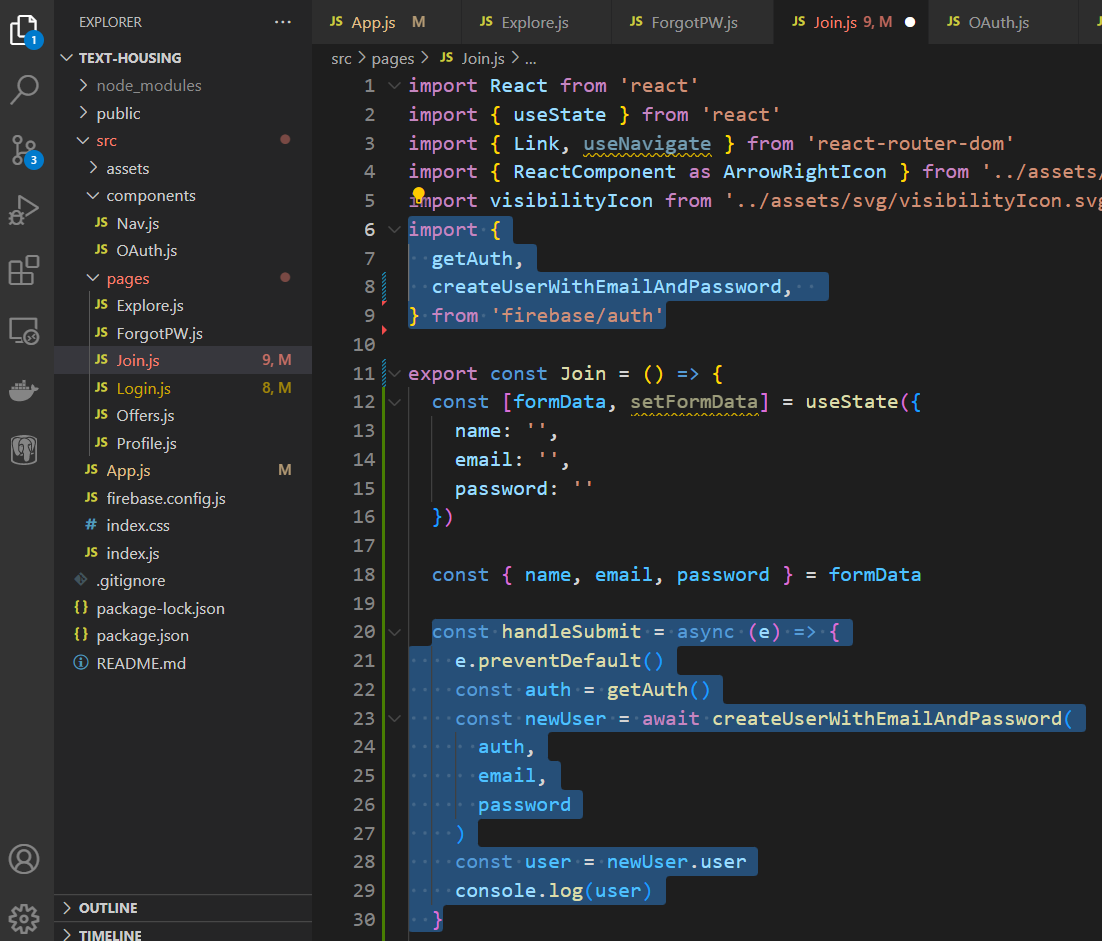
Import the needed services
import {
  getAuth,
  createUserWithEmailAndPassword
} from 'firebase/auth'
Initialize the authentication
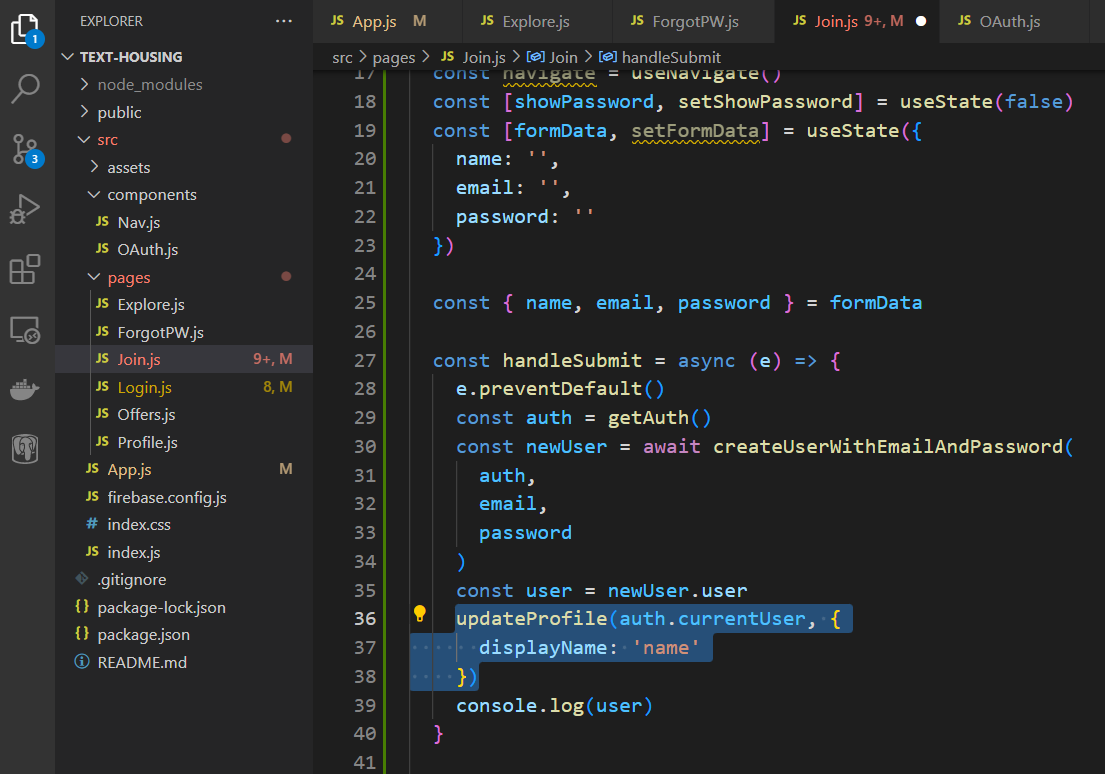
const auth = getAuth()Pass the authentication object, email, and password as parameters to the createUserWithEmailAndPassword function and execute. This function returns the result
const newUser = await createUserWithEmailAndPassword(
  auth,
  email,
  password
)
If there were no errors, a new user would also be saved in the Firebase.
When adding a user, we can use the object returned to add additional information such as a display name

Import updateProfile function
import { updateProfile } from 'firebase/auth'Pass the current user and an object to update information as parameters.
updateProfile(auth.currentUser, {
  displayName: 'name'
})

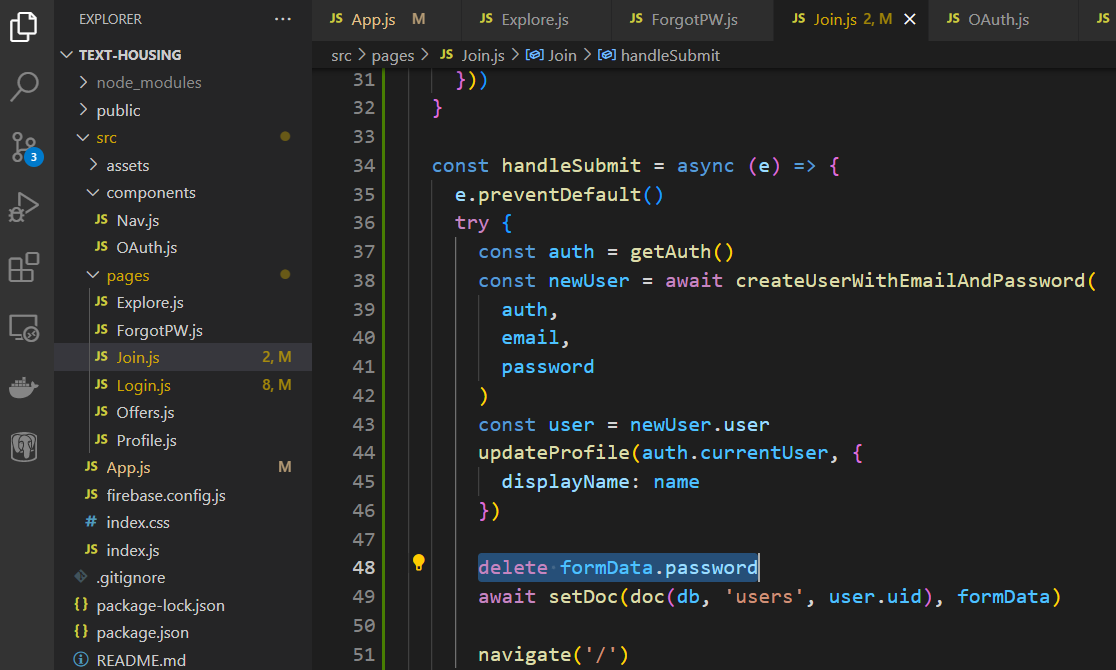
A user in the Authentication service is not well compatible with the data in a database. So it it becomes easier to create an identical user collection in the database.
Let's say we are using Firestore as the database. Import doc and setDoc
import { db } from '../firebase.config'
import { doc, setDoc } from 'firebase/firestore'
Use them to create a table for users and store data.
await setDoc(doc(db, '<collectionName>', <user>.uid), <newUser>)★ Don't forget to delete any sensitive information as storing them in the database is not a smart move.


▶ Log in
Import authentication and login function
import { getAuth, signInWithEmailAndPassword } from 'firebase/auth'Initialize the authentication
const auth = getAuth()Pass the authentication, email, and password as parameters to the signInWithEmailAndPassword function
await signInWithEmailAndPassword(auth, email, password)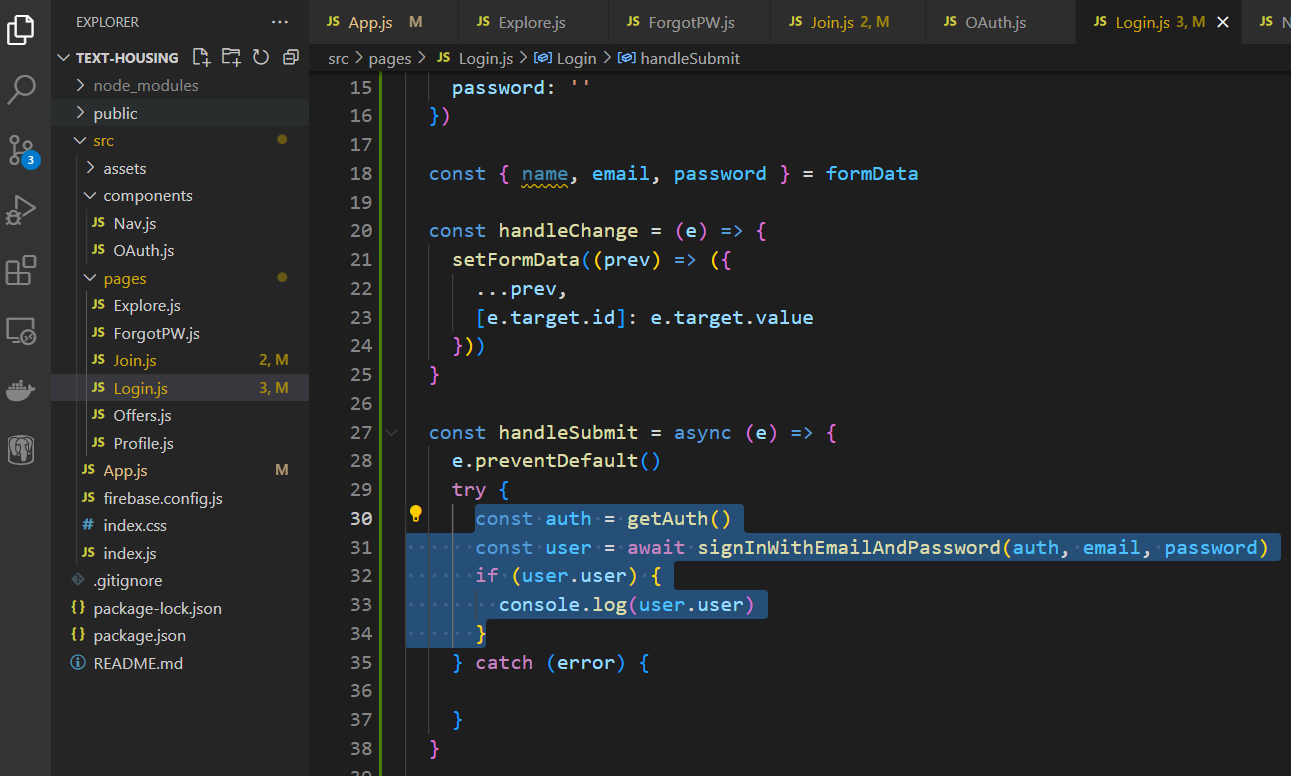

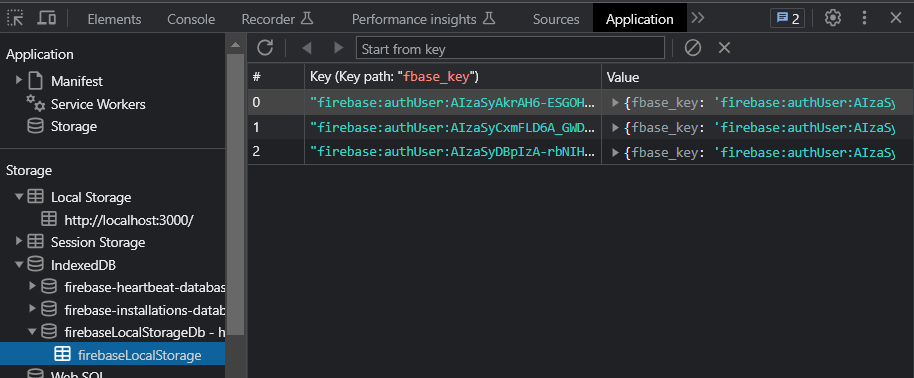
※ To persist the user information on the browser, Firebase uses Indexed DB to store the record
▶ Displaying a Current User
The authentication object has information about users. So we can use information inside the object
import { getAuth } from 'firebase/auth'const auth = getAuth()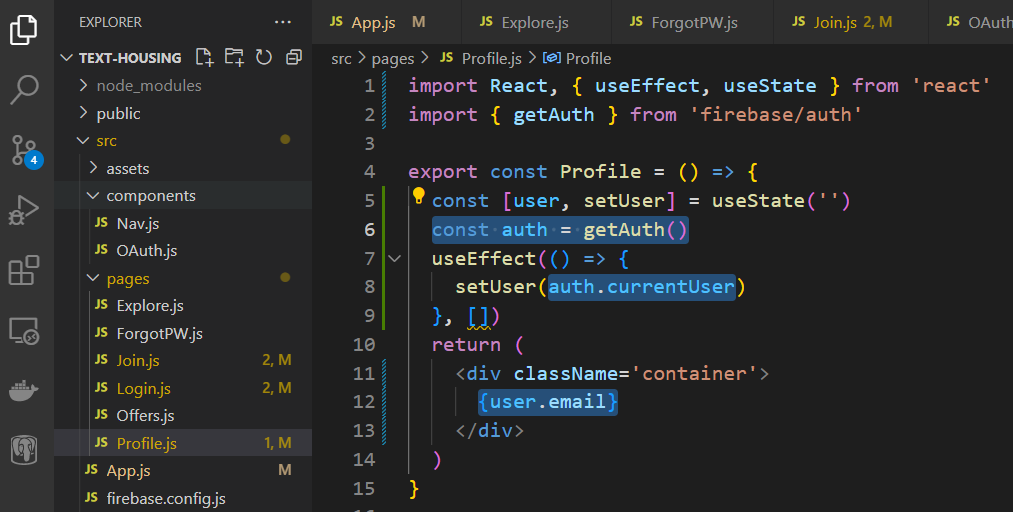
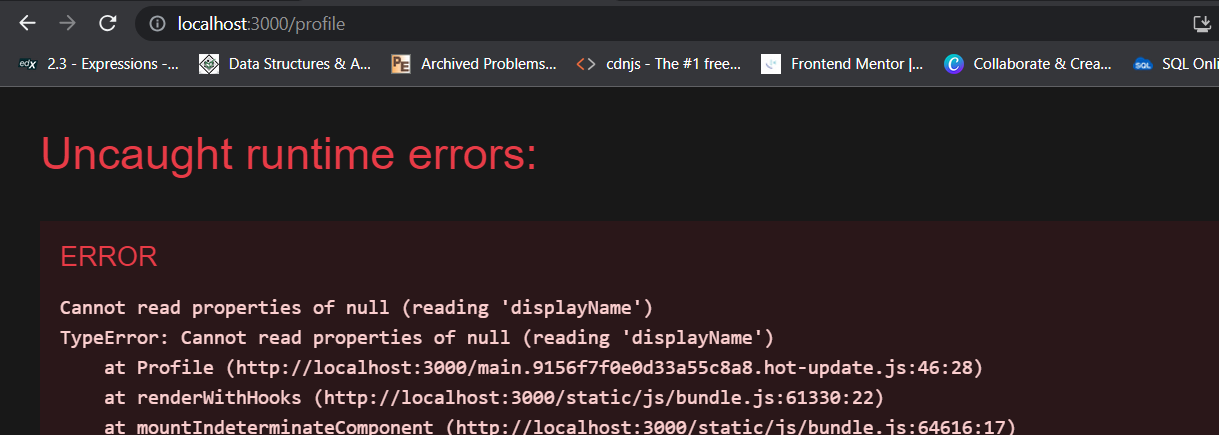
★ When you refresh the page, the component will throw an error because the component is rendered faster than the user data.
To prevent this, we need to tell the component to hang on until the data is ready. We can use onAuthStateChanged to do this.
Import the authentication and the function
import { getAuth, onAuthStateChanged } from 'firebase/auth'Initialize the authentication
const auth = getAuth()Add the useEffect and add the code as shown below
useEffect(() => {
  onAuthStateChanged(auth, (user) => {
    if (user) {
      setUserReady(true)
    }
  })
}, [])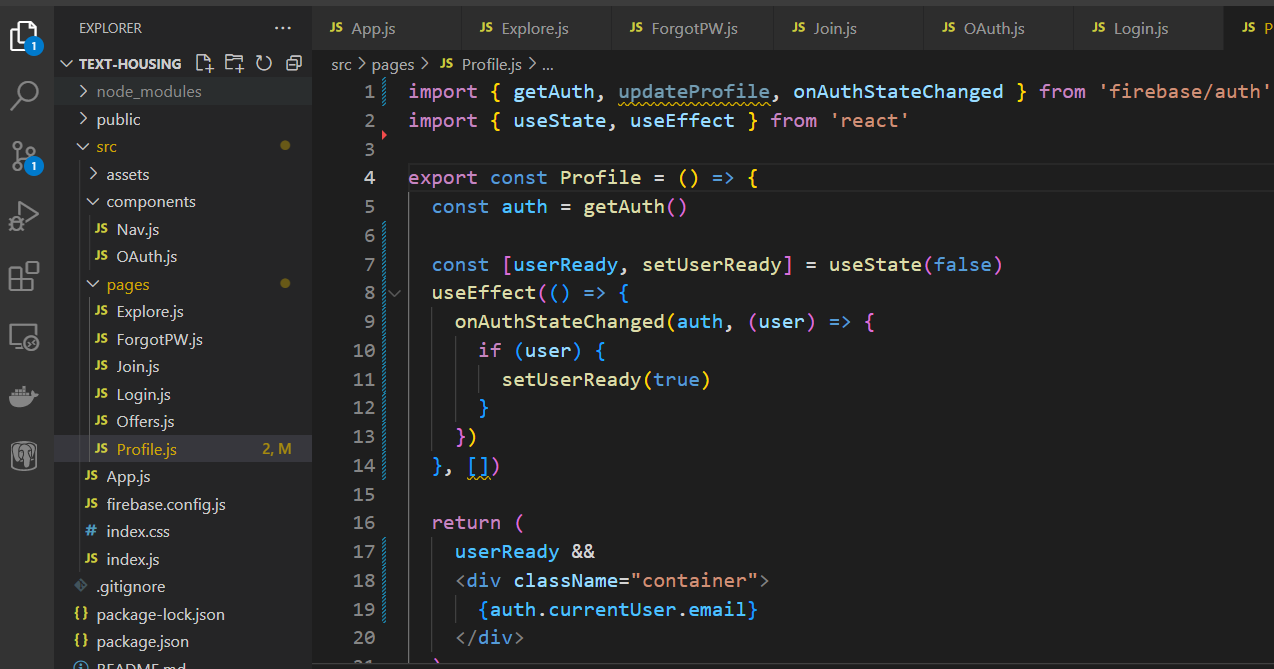
When done, you won't see the error anymore

▶ Reset Password
Import the authentication and reset password function
import { getAuth, sendPasswordResetEmail } from 'firebase/auth'Initialize it
const auth = getAuth()Call the password reset function to logout
await sendPasswordResetEmail(auth, email)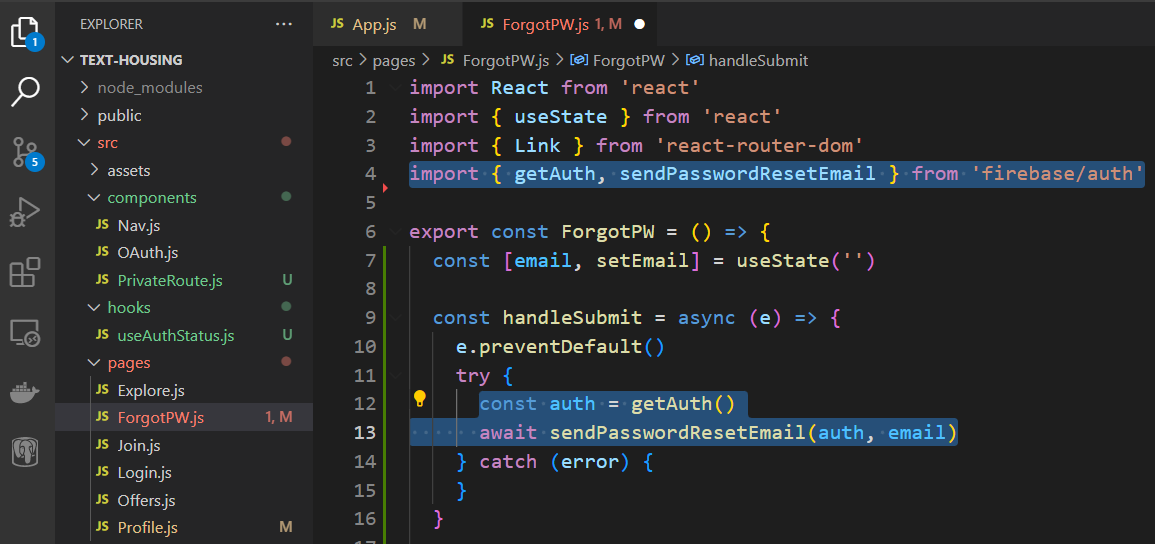
▶ Logout
Import the authentication
import { getAuth } from 'firebase/auth'Initialize it
const auth = getAuth()Call the signOut to logout
auth.signOut()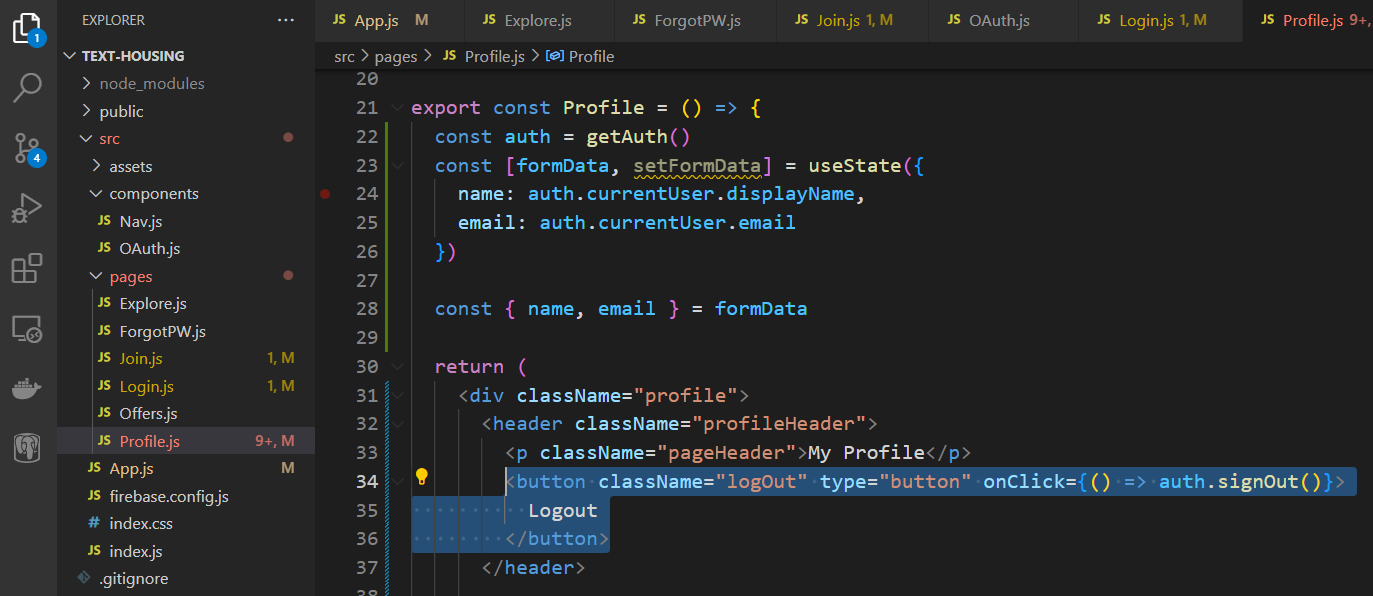
We have seen how to use the Firebase authentication with various applications in this post and I hope it can be helpful.
References
https://firebase.google.com/docs/auth/web/start
웹사이트에서 Firebase 인증 시작하기
Google I/O 2023에서 Firebase의 주요 소식을 확인하세요. 자세히 알아보기 의견 보내기 웹사이트에서 Firebase 인증 시작하기 컬렉션을 사용해 정리하기 내 환경설정을 기준으로 콘텐츠를 저장하고 분
firebase.google.com
'Backend > Firebase' 카테고리의 다른 글
| Firebase Database (Angular, React) (0) | 2023.06.07 |
|---|---|
| Firebase Authentication - Google OAuth (0) | 2023.06.07 |
| Firebase - Connecting to Applications (0) | 2023.06.06 |
| Firebase Storage (Angular, React) (0) | 2023.01.28 |


