
스프링 부트 시큐리티는 권한 없이 엔드포인트에 접근하는 것을 막아 줍니다.
목차
디펜던시
▶ Security
<dependency>
  <groupId>org.springframework.boot</groupId>
  <artifactId>spring-boot-starter-security</artifactId>
</dependency>
테스트
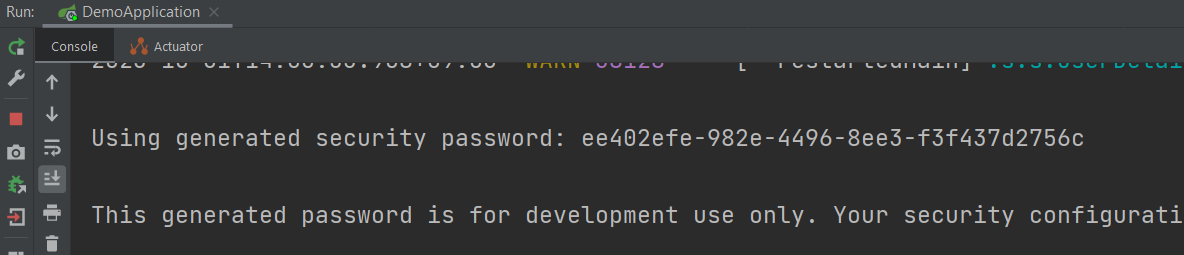
디펜던시를 pom.xml 파일에 추가 후 앱을 가동하면 콘솔에 아래처럼 생성된 비밀번호가 뜹니다.
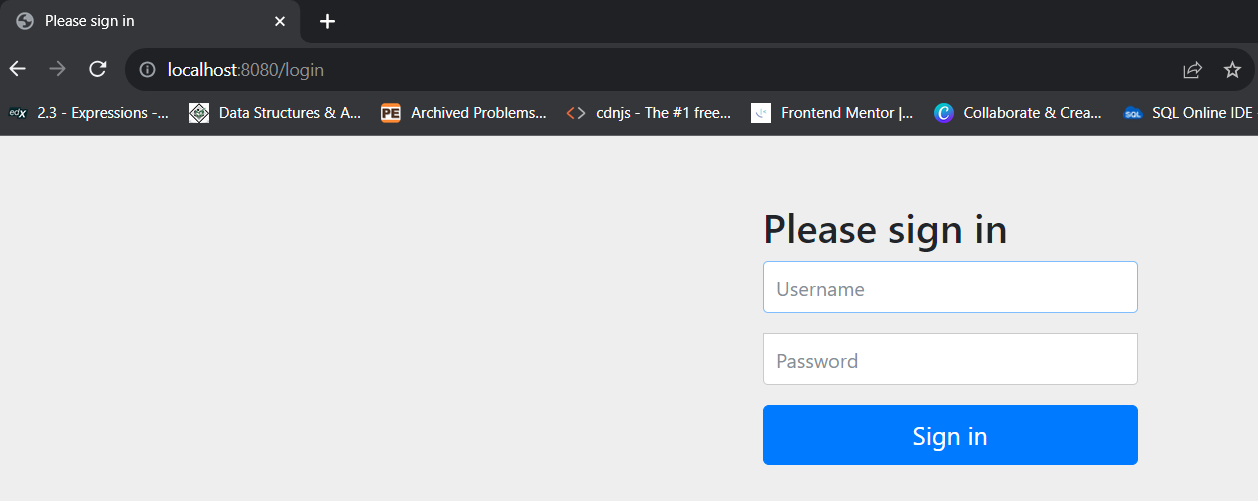
브라우저에서 앱 접근을 시도하면 아래와 같이 아이디와 비밀번호를 요구합니다. 기본 유저이름은 'user'입니다.

아래 속성을 통해 application.property 파일에서 유저와 비밀번호변경이 가능합니다
spring.security.user.name=<name>spring.security.user.password=<password>유저생성하기
유저생성은 애플리케이션 (인메모리) 또는 데이터베이스 (JDBC)에서 가능합니다. 구성파일의 설정은 application.property 파일의 설정을 오버라이드합니다.
구성파일 생성
패키지를 추가하고 인증을 위한 구성파일 생성하고 아래 어노테이션 추가
@Configuration
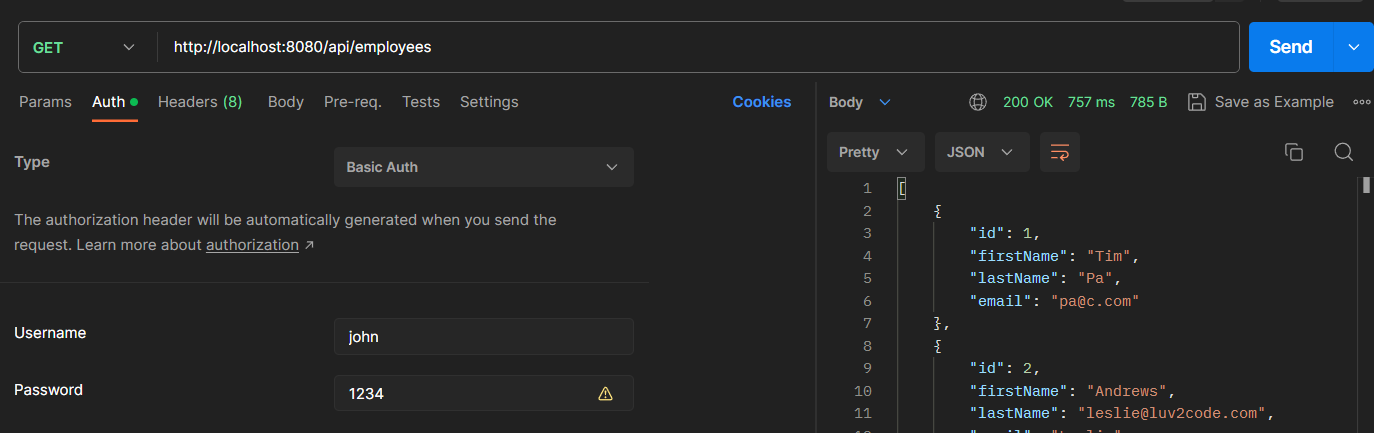
인메모리 방식
먼저, 애플리케이션을 활용한 유저생성은 아래와 같이 구성 파일에 유저를 생성하는 코드를 작성하고 롤을 부여하는 방식으로 구현합니다. 비밀번호 앞에 {noop}은 암호화 처리 없이 일반 텍스트로 저장한다는 의미
package com.example.employeepractice.security;

import org.springframework.context.annotation.Bean;
import org.springframework.context.annotation.Configuration;
import org.springframework.http.HttpMethod;
import org.springframework.security.config.Customizer;
import org.springframework.security.config.annotation.web.builders.HttpSecurity;
import org.springframework.security.core.userdetails.User;
import org.springframework.security.core.userdetails.UserDetails;
import org.springframework.security.provisioning.InMemoryUserDetailsManager;
import org.springframework.security.web.SecurityFilterChain;

@Configuration
public class SecurityConfig {

    @Bean
    public InMemoryUserDetailsManager inMemoryUserDetailsManager() {
        UserDetails john = User.builder()
                .username("john")
                .password("{noop}1234")
                .roles("EMPLOYEE")
                .build();
        UserDetails tom = User.builder()
                .username("tom")
                .password("{noop}1234")
                .roles("EMPLOYEE", "MANAGER")
                .build();
        UserDetails jack = User.builder()
                .username("jack")
                .password("{noop}1234")
                .roles("EMPLOYEE", "MANAGER", "ADMIN")
                .build();
        return new InMemoryUserDetailsManager(john, tom, jack);
    }

    @Bean
    public SecurityFilterChain filterChain(HttpSecurity http) throws Exception {
        http.authorizeHttpRequests(config ->
                config
                        .requestMatchers(HttpMethod.GET, "/api/employees").hasRole("EMPLOYEE")
                        .requestMatchers(HttpMethod.GET, "/api/employees/**").hasRole("EMPLOYEE")
                        .requestMatchers(HttpMethod.POST, "/api/employees").hasRole("MANAGER")
                        .requestMatchers(HttpMethod.PUT, "/api/employees").hasRole("MANAGER")
                        .requestMatchers(HttpMethod.DELETE, "/api/employees/**").hasRole("ADMIN")
        );
        http.httpBasic(Customizer.withDefaults());
        http.csrf(csrf -> csrf.disable());
        return http.build();
    }
}
데이터베이스 활용
다음으로 데이터 베이스를 활용한 방법을 살펴보겠습니다. 먼저, 데이터베이스를 연결합니다.
bcrypt 비밀번호 생성
생성 사이트로 이동 https://www.bcryptcalculator.com/

제공되는 테이블 사용하기
데이터베이스에 테이블 생성. 테이블, 필드명은 정해진 이름을 사용하므로 반드시 일치해야 함. 데이터베이스에 저장되는 비밀번호는 암호처리가 필요하므로 아래와 같이 {bcrypt} <암호처리된 비밀번호>를 사용합니다.
DROP TABLE IF EXISTS `authorities`;
DROP TABLE IF EXISTS `users`;
CREATE TABLE `users` (
	`username` varchar(50) NOT NULL,
	`password` varchar(68) NOT NULL,
	`enabled` tinyint NOT NULL,
	PRIMARY KEY(`username`)
) ENGINE=InnoDB DEFAULT CHARSET=latin1;
INSERT INTO `users`
VALUES
('john', '{bcrypt}$2a$10$VlimMGxj5O5/VM64Pvq0Vu80cK9MW/lZKagKAzHNPV3IOXZHvawb6', 1),
('tom', '{bcrypt}$2a$10$PQxxeKzFuHrZvXpgZJijBOpIoNVJK2jF8FPu410Q1TyTvA15VZm6.', 1),
('jack', '{bcrypt}$2a$10$H5ruiZZJ3je6sqV/Iu2EsezmSH2UH5nhFtvQPo2I4RLdoeNVK96/2', 1);

CREATE TABLE `authorities` (
	`username` varchar(50) NOT NULL,
	`authority` varchar(50) NOT NULL,
	UNIQUE KEY `authorities_idx_1` (`username`, `authority`),
    CONSTRAINT `authorities_idfk_1` FOREIGN KEY (`username`) REFERENCES `users` (`username`)
) ENGINE=InnoDB DEFAULT CHARSET=latin1;
INSERT INTO `authorities`
VALUES
('john', 'ROLE_EMPLOYEE'),
('tom', 'ROLE_EMPLOYEE'),
('tom', 'ROLE_MANAGER'),
('jack', 'ROLE_MANAGER'),
('jack', 'ROLE_EMPLOYEE'),
('jack', 'ROLE_ADMIN');
구성파일에 아래와 같이 코드 작성
package com.example.employeepractice.security;

import org.springframework.context.annotation.Bean;
import org.springframework.context.annotation.Configuration;
import org.springframework.http.HttpMethod;
import org.springframework.security.config.Customizer;
import org.springframework.security.config.annotation.web.builders.HttpSecurity;
import org.springframework.security.provisioning.JdbcUserDetailsManager;
import org.springframework.security.provisioning.UserDetailsManager;
import org.springframework.security.web.SecurityFilterChain;

import javax.sql.DataSource;

@Configuration
public class SecurityConfig {

    @Bean
    public UserDetailsManager userDetailsManager(DataSource dataSource) {
        return new JdbcUserDetailsManager(dataSource);
    }

    @Bean
    public SecurityFilterChain filterChain(HttpSecurity http) throws Exception {
        http.authorizeHttpRequests(config ->
                config
                        .requestMatchers(HttpMethod.GET, "/api/employees").hasRole("EMPLOYEE")
                        .requestMatchers(HttpMethod.GET, "/api/employees/**").hasRole("EMPLOYEE")
                        .requestMatchers(HttpMethod.POST, "/api/employees").hasRole("MANAGER")
                        .requestMatchers(HttpMethod.PUT, "/api/employees").hasRole("MANAGER")
                        .requestMatchers(HttpMethod.DELETE, "/api/employees/**").hasRole("ADMIN")
        );
        http.httpBasic(Customizer.withDefaults());
        http.csrf(csrf -> csrf.disable());
        return http.build();
    }
}
커스텀 테이블 사용하기
스프링에서 제공되는 테이블의 경우 정해진 이름을 사용해야 하기 때문에 테이블이나 필드명 변경이 필요한 경우 추가 설정이 필요합니다.
아래 쿼리를 실행하여 커스텀 테이블 생성
DROP TABLE IF EXISTS `roles`;
DROP TABLE IF EXISTS `members`;
CREATE TABLE `members` (
	`id` varchar(50) NOT NULL,
	`pw` varchar(68) NOT NULL,
	`active` tinyint NOT NULL,
	PRIMARY KEY(`id`)
) ENGINE=InnoDB DEFAULT CHARSET=latin1;
INSERT INTO `members`
VALUES
('john', '{bcrypt}$2a$10$VlimMGxj5O5/VM64Pvq0Vu80cK9MW/lZKagKAzHNPV3IOXZHvawb6', 1),
('tom', '{bcrypt}$2a$10$PQxxeKzFuHrZvXpgZJijBOpIoNVJK2jF8FPu410Q1TyTvA15VZm6.', 1),
('jack', '{bcrypt}$2a$10$H5ruiZZJ3je6sqV/Iu2EsezmSH2UH5nhFtvQPo2I4RLdoeNVK96/2', 1);

CREATE TABLE `roles` (
	`id` varchar(50) NOT NULL,
	`role` varchar(50) NOT NULL,
	UNIQUE KEY `authorities_idx_2` (`id`, `role`),
    CONSTRAINT `authorities_idfk_2` FOREIGN KEY (`id`) REFERENCES `members` (`id`)
) ENGINE=InnoDB DEFAULT CHARSET=latin1;
INSERT INTO `roles`
VALUES
('john', 'ROLE_EMPLOYEE'),
('tom', 'ROLE_EMPLOYEE'),
('tom', 'ROLE_MANAGER'),
('jack', 'ROLE_MANAGER'),
('jack', 'ROLE_EMPLOYEE'),
('jack', 'ROLE_ADMIN');
UserDetailManager 메서드에 커스텀 테이블에 아래 코드를 추가하여 기본 설정 변경. 이때, '?'는 들어오는 값으로 치환됩니다.
jdbcUserDetailsManager.setUsersByUsernameQuery(
    "select id, pw, active from members where id=?"
);
jdbcUserDetailsManager.setAuthoritiesByUsernameQuery(
    "select id, roles from where id=?"
);
package com.example.employeepractice.security;
import org.springframework.context.annotation.Bean;
import org.springframework.context.annotation.Configuration;
import org.springframework.http.HttpMethod;
import org.springframework.security.config.Customizer;
import org.springframework.security.config.annotation.web.builders.HttpSecurity;
import org.springframework.security.core.userdetails.User;
import org.springframework.security.core.userdetails.UserDetails;
import org.springframework.security.provisioning.InMemoryUserDetailsManager;
import org.springframework.security.provisioning.JdbcUserDetailsManager;
import org.springframework.security.provisioning.UserDetailsManager;
import org.springframework.security.web.SecurityFilterChain;
import javax.sql.DataSource;
@Configuration
public class SecurityConfig {
@Bean
public UserDetailsManager userDetailsManager(DataSource dataSource) {
JdbcUserDetailsManager jdbcUserDetailsManager = new JdbcUserDetailsManager(dataSource);
jdbcUserDetailsManager.setUsersByUsernameQuery(
"select id, pw, active from members where id=?"
);
jdbcUserDetailsManager.setAuthoritiesByUsernameQuery(
"select id, role from where id=?"
);
return jdbcUserDetailsManager;
}
@Bean
public SecurityFilterChain filterChain(HttpSecurity http) throws Exception {
http.authorizeHttpRequests(config ->
config
.requestMatchers(HttpMethod.GET, "/api/employees").hasRole("EMPLOYEE")
.requestMatchers(HttpMethod.GET, "/api/employees/**").hasRole("EMPLOYEE")
.requestMatchers(HttpMethod.POST, "/api/employees").hasRole("MANAGER")
.requestMatchers(HttpMethod.PUT, "/api/employees").hasRole("MANAGER")
.requestMatchers(HttpMethod.DELETE, "/api/employees/**").hasRole("ADMIN")
);
http.httpBasic(Customizer.withDefaults());
http.csrf(csrf -> csrf.disable());
return http.build();
}
}디버그
아래 속성을 application.property 파일에 추가하면 좀 더 자세한 에러 메시지를 볼 수 있습니다.
logging.level.org.springframework.security=DEBUG로그인 페이지
구성파일에 .formLogin 설정추가
@Bean
public SecurityFilterChain filterChain(HttpSecurity httpSecurity) throws Exception {
    httpSecurity.authorizeHttpRequests(config ->
                    config
                            .requestMatchers("/").hasRole("EMP")
                            .requestMatchers("/manage/**").hasRole("MAN")
                            .requestMatchers("/system/**").hasRole("ADM")
                            .anyRequest().authenticated()
            ).formLogin(form -> form
                    .loginPage("/login")
                    .loginProcessingUrl("/loginProcess")
                    .permitAll()
            )
    return httpSecurity.build();
}
컨트롤러에 엔드포인트 생성
@GetMapping("/login")
public String login() {
    return "login";
}
템플릿 생성. 참고로 에러가 발생할 때 URL에 추가되는 파라미터를 통해 아래처럼 에러메시지 표시가능
<!DOCTYPE html>
<html lang="en" xmlns:th="http://www.thymeleaf.com">
<head>
    <meta charset="UTF-8">
    <title>Title</title>
</head>
<body>
<form action="#" th:action="@{/loginProcess}" method="POST">
    <!--error message-->
    <div th:if="${param.error}">
        <p>Invalid</p>
    </div>

    <p>
        <input type="text" name="username"/>
    </p>
    <p>
        <input type="password" name="password"/>
    </p>
    <input type="submit" value="Login"/>
</form>
</body>
</html>
로그아웃
구성파일에 .logout 설정추가
@Bean
public SecurityFilterChain filterChain(HttpSecurity httpSecurity) throws Exception {
    httpSecurity.authorizeHttpRequests(config ->
                    config
                            .requestMatchers("/").hasRole("EMP")
                            .requestMatchers("/manage/**").hasRole("MAN")
                            .requestMatchers("/system/**").hasRole("ADM")
                            .anyRequest().authenticated()
            ).formLogin(form -> form
                    .loginPage("/login")
                    .loginProcessingUrl("/loginProcess")
                    .permitAll()
            )
            .logout(logout -> logout.permitAll()
            )
    return httpSecurity.build();
}
템플릿에 로그아웃 폼 추가로 완성 (로그아웃 엔드포인트 등은 자동으로 제공됨)
<form action="#" th:action="@{/logout}" method="POST">
    <button type="submit">Logout</button>
</form>
에러처리
구성파일에 .exceptionHandling 설정추가
@Bean
public SecurityFilterChain filterChain(HttpSecurity httpSecurity) throws Exception {
    httpSecurity.authorizeHttpRequests(config ->
                    config
                            .requestMatchers("/").hasRole("EMP")
                            .requestMatchers("/manage/**").hasRole("MAN")
                            .requestMatchers("/system/**").hasRole("ADM")
                            .anyRequest().authenticated()
            ).formLogin(form -> form
                    .loginPage("/login")
                    .loginProcessingUrl("/loginProcess")
                    .permitAll()
            )
            .logout(logout -> logout.permitAll()
            )
            .exceptionHandling(config -> config.accessDeniedPage("/access-denied")
            );
    return httpSecurity.build();
}
컨트롤러에 엔드포인트 추가
@GetMapping("/access-denied")
public String accessDenied() {
    return "access-denied";
}
템플릿 생성
<!DOCTYPE html>
<html lang="en" xmlns:th="http://www.thymeleaf.com">
<head>
    <meta charset="UTF-8">
    <title>Title</title>
</head>
<body>
<h3>Access Denied</h3>
<a th:href="@{/}">Back</a>
</body>
</html>
이상으로 스프링부트 시큐리티에 대해 알아보았습니다.
참고
Spring Security Reference
The authenticator is also responsible for retrieving any required user attributes. This is because the permissions on the attributes may depend on the type of authentication being used. For example, if binding as the user, it may be necessary to read them
docs.spring.io
▶ bcrypt 생성
Bcrypt Calculator
www.bcryptcalculator.com
'백엔드 > 자바' 카테고리의 다른 글
| 스프링 부트 폼 (1) | 2023.10.22 |
|---|---|
| 롬복 (0) | 2023.10.07 |
| 스프링 부트 엑츄에이터 (0) | 2023.10.01 |
| 데이터베이스 조작 도구 (JPA, 하이버네이, 마이바티스) (0) | 2023.09.04 |
| 스프링빈 빈 등록 (디펜던시 인젝션) (0) | 2023.08.30 |


