
Angular template-driven form provides easier way to handle form manipulations. In this writing, we will see how to use the template-driven form.
Implementation
First, add the forms module in the module file
//scr/app/app.module.ts

import { NgModule } from '@angular/core';
import { FormsModule } from '@angular/forms';
import { BrowserModule } from '@angular/platform-browser';

import { AppRoutingModule } from './app-routing.module';
import { AppComponent } from './app.component';

@NgModule({
  declarations: [
    AppComponent
  ],
  imports: [
    BrowserModule,
    AppRoutingModule,
    FormsModule // forms module
  ],
  providers: [],
  bootstrap: [AppComponent]
})
export class AppModule { }
※ The reason why we need to add module in the module file is to use them in a template file. Without adding the module in the module file you won't be able to use binding
Next, add a form in a template file
<!-- form.component.html -->
<form>
<div>
<input type="text">
</div>
<div>
<input type="text">
</div>
<div>
<input type="text">
</div>
<button>Submit</button>
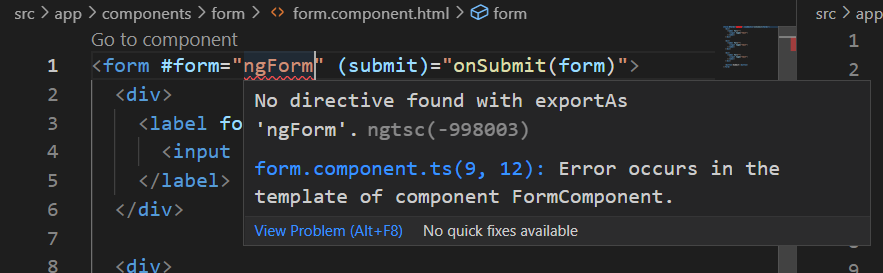
</form>Create a template variable in the form and add 'ngForm' as the value to connect the form to the forms module.
<!-- form.component.html -->

<form #form="ngForm">
  <div>
    <input type="text">
  </div>

  <div>
    <input type="text">
  </div>

  <div>
    <input type="text">
  </div>

  <button>Submit</button>
</form>
Add a submit event and pass the template variable as a value
<!-- form.component.html -->

<form #form="ngForm" (submit)="onSubmit(form)">
  <div>
    <input type="text">
  </div>

  <div>
    <input type="text">
  </div>

  <div>
    <input type="text">
  </div>

  <button>Submit</button>
</form>
In the class file, add a function (onSbumit()) with a parameter. The type of the parameter is 'NgForm' from the forms module
/** form.component.ts */
import { Component, OnInit } from '@angular/core';
import { NgForm } from '@angular/forms'; // forms module
@Component({
selector: 'app-form',
templateUrl: './form.component.html',
styleUrls: ['./form.component.css']
})
export class FormComponent implements OnInit {
constructor() { }
ngOnInit(): void {
}
onSubmit(form: NgForm) {
console.log(form)
}
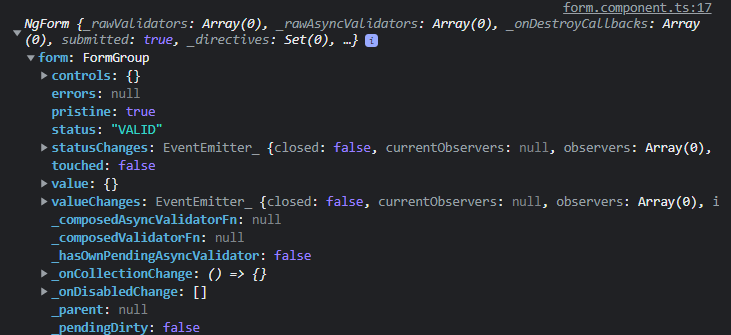
}Let's submit the form to see what is inside. controls represents each input in the form. Even though we can see the form with various values we can use such as value, status, errors, touched, you will see an empty object as no controls are linked to the form yet.
To linke the control with each field, we need 'name' attribute and 'ngModel' attribute. the 'name' attributes is the identifier of the control and the 'ngModel' attribute links the control to the form. If you miss any of the two it is won't work properly.
<!-- form.component.html -->

<form #form="ngForm" (submit)="onSubmit(form)">
  <div>
    <input type="text" name="name" ngModel>
  </div>

  <div>
    <input type="text" name="phone" ngModel>
  </div>

  <div>
    <input type="text" name="email" ngModel>
  </div>

  <button>Submit</button>
</form>
Now, let's submit again. This time you will see controls coming in as well

validations
Validation in a template-driven form is done in the template which makes it easier to work with. Below is the form with a 'required' validation
<!-- form.component.html -->

<form #form="ngForm" (submit)="onSubmit(form)">
  <div>
    <input type="text" name="name" ngModel required>
  </div>

  <div>
    <input type="text" name="phone" ngModel required>
  </div>

  <div>
    <input type="text" name="email" ngModel required>
  </div>

  <button>Submit</button>
</form>
Submit the form without filling in the fields and you will see the the 'status' is 'INVALID'

Now, using the features mensioned above, let's make a simple form with validations and error messages
<!-- form.component.html -->

<form #form="ngForm" (submit)="onSubmit(form)">
  <div>
    <input type="text" name="name" ngModel required #name="ngModel">
  </div>

  <div>
    <input type="text" name="phone" ngModel required #phone="ngModel">
  </div>

  <div>
    <input type="text" name="email" ngModel required #email="ngModel">
  </div>

  <button>Submit</button>
</form>
Add a text tag to show the error message when it is invalid using 'ng-if'
<!-- form.component.html -->

<form #form="ngForm" (submit)="onSubmit(form)">
  <div>
    <input type="text" name="name" ngModel required #name="ngModel">
    <div *ngIf="name.touched && name.errors?.['required']">name required</div>
  </div>

  <div>
    <input type="text" name="phone" ngModel required #phone="ngModel">
    <div *ngIf="phone.touched && phone.errors?.['required']">phone required</div>
  </div>

  <div>
    <input type="text" name="email" ngModel required #email="ngModel">
    <div *ngIf="email.touched && email.errors?.['required']">email required</div>
  </div>

  <button>Submit</button>
</form>
I have added 'touched' to show the error message only after a user clicked the input and did not meet the requirements for a better UX
※ You can also use the status (invalid or valid) of a control when you plan to add only one validation for a certain field. But not recommended for multiple validations for a field because it is hard to distingush between each error.
<!-- form.component.html -->

<form #form="ngForm" (submit)="onSubmit(form)">
  <div>
    <input type="text" name="name" ngModel required #name="ngModel">
    <div *ngIf="name.touched && name.invalid">name required</div>
  </div>

  <div>
    <input type="text" name="phone" ngModel required #phone="ngModel">
    <div *ngIf="phone.touched && phone.invalid">phone required</div>
  </div>

  <div>
    <input type="text" name="email" ngModel required #email="ngModel">
    <div *ngIf="email.touched && email.invalid">email required</div>
  </div>

  <button>Submit</button>
</form>
Now. add the code below to handle the form depending on the status of the form
/** form.component.ts */

import { Component, OnInit } from '@angular/core';
import { NgForm } from '@angular/forms';

@Component({
  selector: 'app-form',
  templateUrl: './form.component.html',
  styleUrls: ['./form.component.css']
})
export class FormComponent implements OnInit {

  constructor() { }

  ngOnInit(): void {
  }

  onSubmit(form: NgForm) {
    if(form.valid) {
      console.log(form)
      // add an action when form is valid
    }
    form.resetForm()
  }
}
In this writing, we have seen Angular template-driven form.
'Frontend > Angular' 카테고리의 다른 글
| Angular - How to Use HTTPS in Development (1) | 2023.03.12 |
|---|---|
| Angular Forms - Reactive Form (0) | 2023.03.10 |
| Angular Material - Adding Modules (module list) (0) | 2023.03.06 |
| Angular Modal (0) | 2023.02.27 |
| What is Angular? (0) | 2023.02.21 |


