React, by nature, does not have a routing feature. React Router DOM is one of the React library packages; with this, we can easily create routing between pages. Let's see how we can use this library.
List of Contents
- Project Set Up
- Implementation
- Nested Routing
- Adding Parameters
- Adding Navigation
- Showing Activated Menus
- Private Route
Project Set Up
Creating a React Project
React
React is the most papular framework followed by Angular and Vue. React, like Angular uses components to build an application. However, React does not come with native features like Angular. Instead, it uses other libraries which makes React compact and sma
jin-co.tistory.com
Adding Components
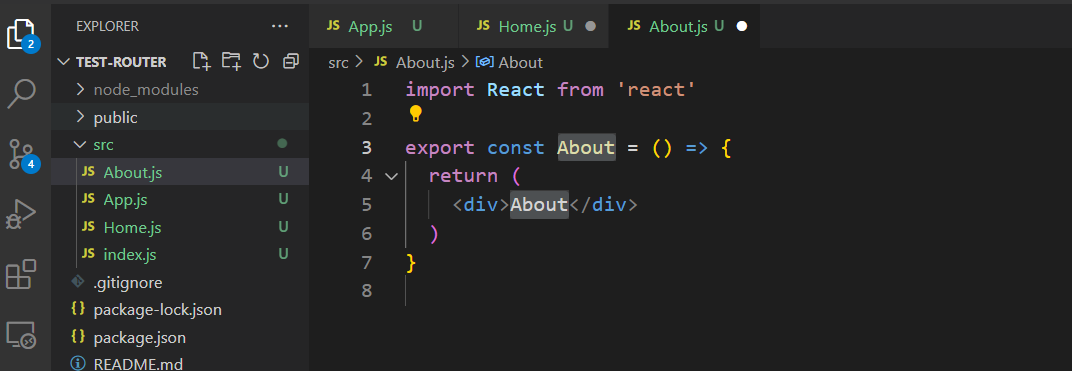
For demonstration, add components to move between

Implementation
Installing the Package
In the console, use the command below to install the necessary package
npm i react-router-dom
Setting Up Routing
Import the library to the component. We need 'BrowserRouter', 'Routes', and 'Route'
import { BrowserRouter as Router, Routes, Route } from 'react-router-dom'▶ BrowserRouter
This tag allows to identify the path using '/' as a separator
▶ Routes
Wraps each route. For React router DOM version 6 and above, 'route' must be inside this tag to work
▶ Route
Specifies the component to open on a path. By default, the path is set to include meaning if we used '/' for the main, then the main will be open when we open any path that includes '/'. To prevent this, add an 'exact' option which only opens when the path is the exact match
<Router>
  <Routes>
    <Route exact path='/' element={<Home />} />
    <Route path='/about' element={<About />} />
  </Routes>
</Router>

Nested Routing
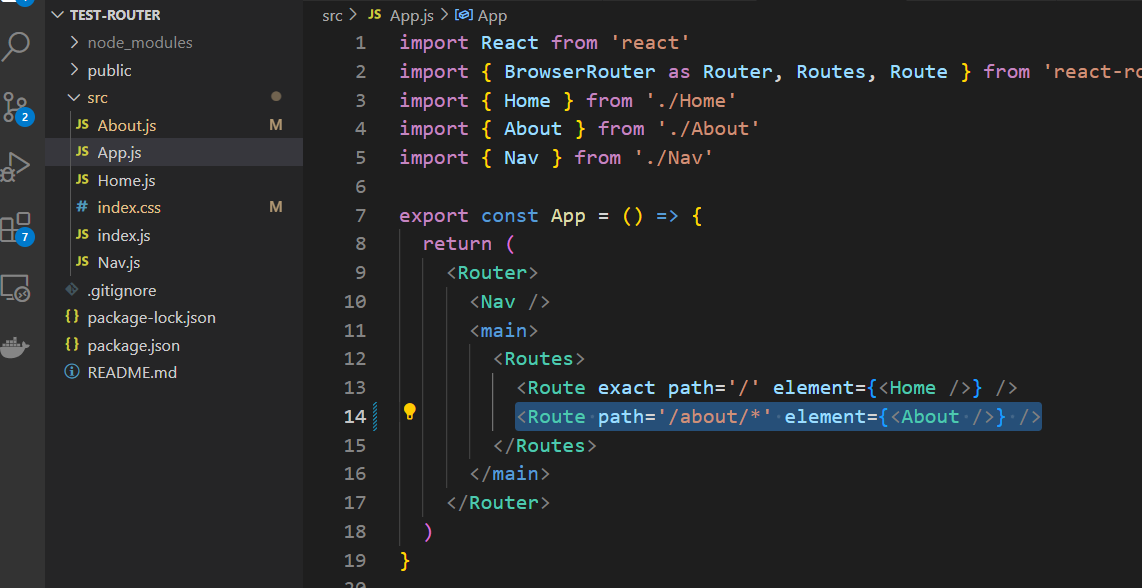
We can add a subroute by adding an asterisk at the end of a route.
/*
Go to the component you and add another route
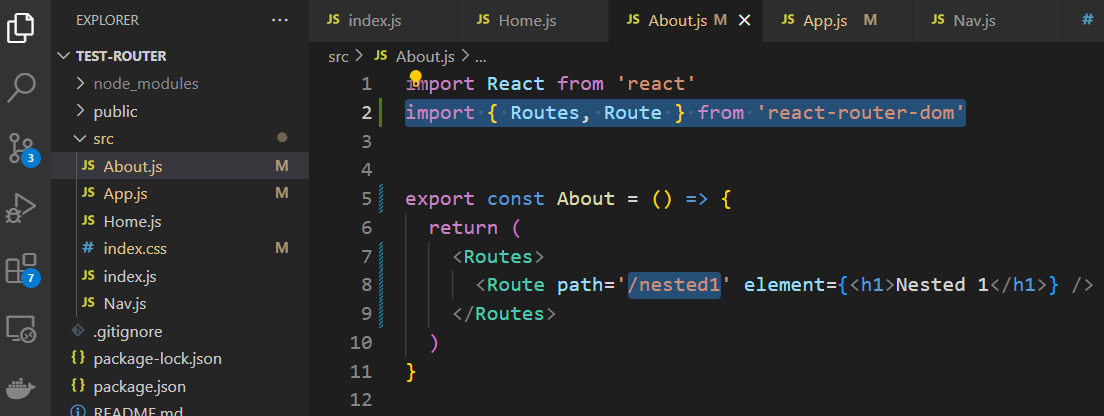
Then the route will open only when that specific route is used

Adding Parameters
React Hook - UseParams (React Router DOM)
React Router DOM is one of the package of the React library and, with this, we can easily create routing between pages. Today we will see how we can use one of its hooks called 'useParams' Project Set Up Creating a React Project React React is the most pap
jin-co.tistory.com
Adding Navigation
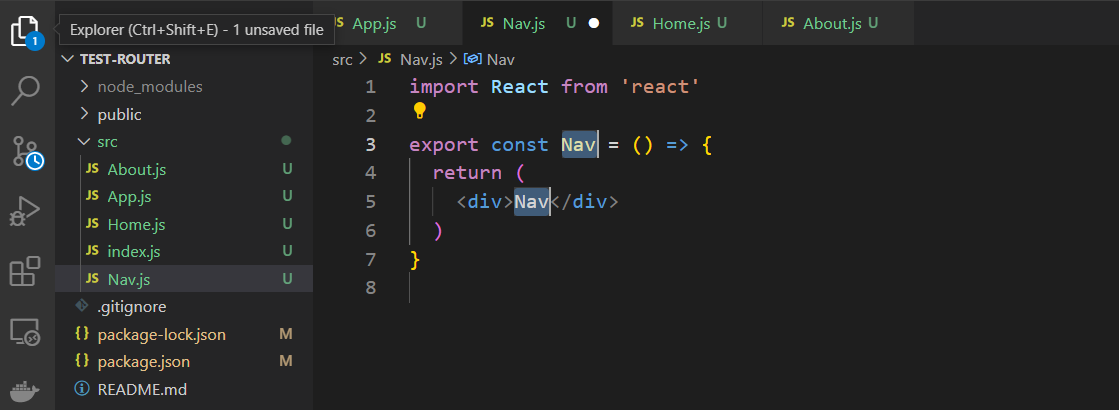
Create a navigation component
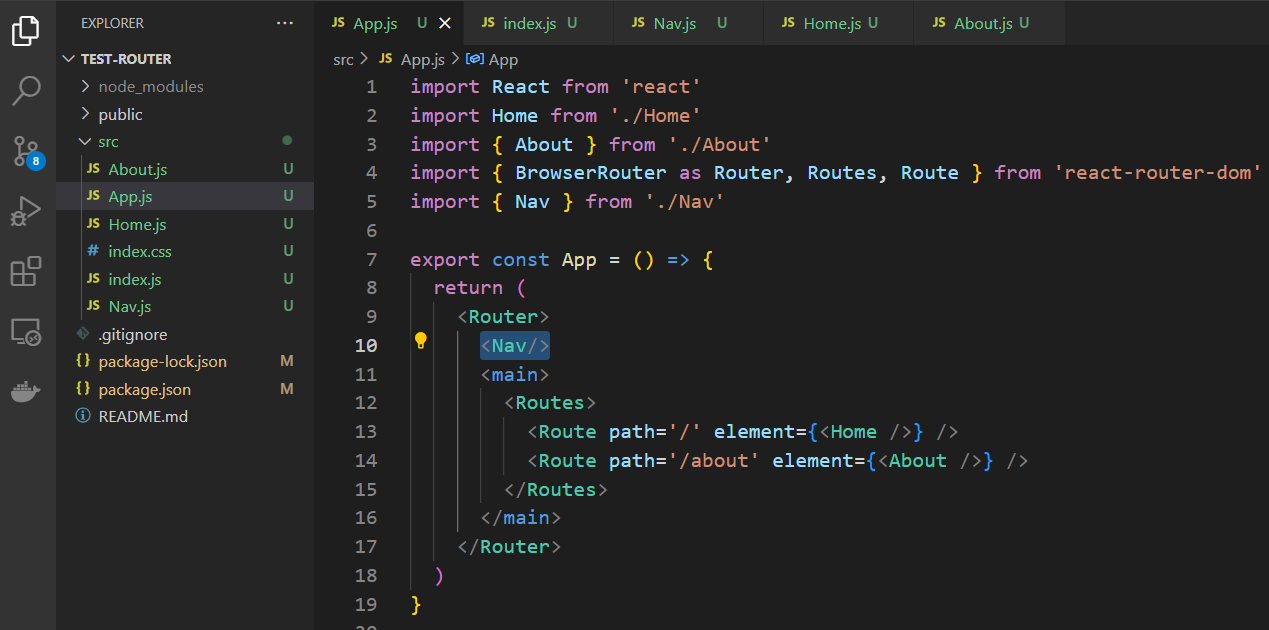
Add the component to the main
Link
Go to the navigation component and import the 'Link'
import { Link } from 'react-router-dom'Use the 'to' attribute to specify a path
<Link to={'/'}>Home</Link>
useNavigate
Go to the navigation component and import the 'useNavigate'
import { useNavigate } from 'react-router-dom'Initialize it to a variable
const navigate = useNavigate()Use the variable to specify a path
<button onClick={() => navigate('/')}>Go</button>

Showing Activated Menus
NavLink
For visual effects for the activated menu item, we can use 'NavLink' which allows us to add a class to a selected menu. Open the navigation component and import 'NavLink'
import { NavLink } from 'react-router-dom'Replace it with a 'Link' tag then add the 'activeCalssName' attribute with desired class name as its value
<NavLink exact to='/' activeClassName='active'>Home</NavLink>Add styles in the CSS file with the class name
.active {
  background-color: rebeccapurple;
}
useLocation
We can also use the useLocation hook to show an activated menu. Import the useLocation
import { useLocation } from 'react-router-dom'Initialize it to a variable
const location = useLocation()The hook returns the path name so we can use the path name as one side of the condition as shown below to show an activated menu.
<li style={{color: location.pathname === '/' ? '#2c2c2c' : '#8f8f8f'}} />Home</li>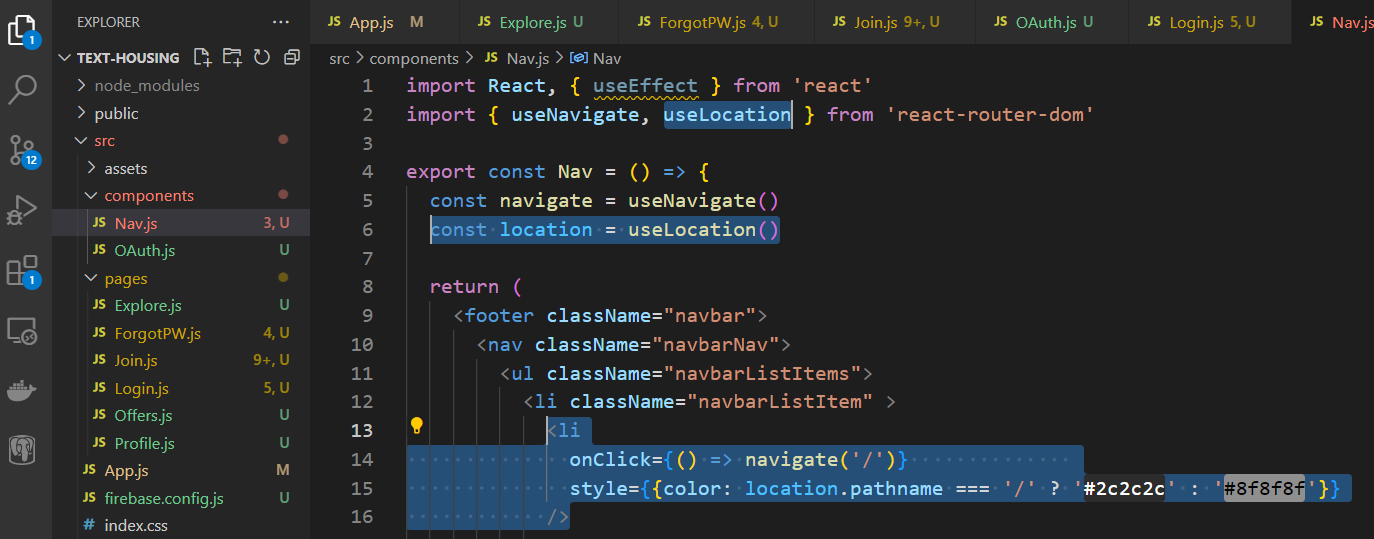
Private Route
Once you set the route, anyone can access the page even if you hide links from view by manually typing the path. So if the page is only available for logged-in users, we need to do some additional setup.
Create a component to check if the user is logged in and to send them depending on the result. Import Navigate and Outlet
import { Navigate, Outlet } from "react-router-dom"
Implement the code to send a user either to the private page or the other page
const isLogged = false
return isLogged ? <Outlet /> : <Navigate to='/login ' />
Go to the component that has the entire routes and update the route you want to make private by nesting a route under the other. Note that the path must match.
<Route exact path='/profile' element={<PrivateRoute />}>
  <Route path='/profile' element={<Profile />} />
</Route>
In this writing, we have seen how to use the React router DOM to navigate between pages easily.
References
Traversy Media
Traversy Media features the best online web development and programming tutorials for all of the latest web technologies from the building blocks of HTML, CSS & JavaScript to frontend frameworks like React and Vue to backend technologies like Node.js, Pyth
www.youtube.com
'Frontend > React' 카테고리의 다른 글
| React Hook - Redirection (React Router DOM) (0) | 2023.05.03 |
|---|---|
| React Hooks - UseParams / UseSearchParams (React Router DOM) (0) | 2023.05.03 |
| React Library - Framer Motion (0) | 2023.05.01 |
| Hooks - State Management (useState, useReducer) (0) | 2023.04.19 |
| Displaying a List (1) | 2023.04.17 |


