
CSS flex는 레이아웃을 결정하는 디스플레이 요소 중 하나로 테이블처럼 열 또는 행을 지정해서 원하는 레이아웃을 간편하게 만들 수 있게 해 줍니다.
사용법
먼저 flex와 사용가능한 속성들을 보겠습니다.
flex 지정 속성
- flex-direction: flex 컨테이너의 방향을 열 또는 행으로 지정 (행이 기본값)
- flex-shrink: 컨테이너의 크기가 줄어들 때 줄어들 비율
- flex-grow: 컨테이너의 크기가 증가할 때 증가할 비율
- flex-basis: 기본크기
- flex: flex-grow, flex-shrink, flex-basis를 한 번에 지정하는 속성
styling 속성
- gap: 간격
정렬 속성
- justify-content: 가로 또는 세로 정렬 (플렉스의 방향에 따라 달라짐)
- align-content: 세로 또는 가로 정렬 (플렉스의 방향에 따라 달라짐)
index.html
<!DOCTYPE html>
<html>
<head>

</head>
<body>

<body>
  <div class="container">
    <div class="box1" style="height:50px; width:50px; background-color:yellow;"></div>
    <div class="box2" style="height:50px; width:50px; background-color:blue;"></div>
    <div class="box3" style="height:50px; width:50px; background-color:red;"></div>
    <div class="box4" style="height:50px; width:50px; background-color:grey;"></div>
    <div class="box5" style="height:50px; width:50px; background-color:purple;"></div>
    <div class="box6" style="height:50px; width:50px; background-color:green;"></div>
  </div>
</body>

</html>
기본적으로 각요소는 화면에 흐름에 따라 표현되므로 아래와 같이 화면에 나타납니다 (Block 요소).
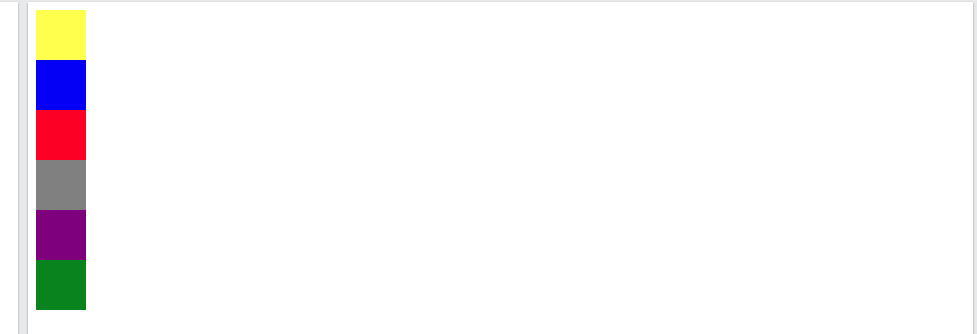
먼저 기본적인 flex를 지정해 보겠습니다.
<!DOCTYPE html>
<html>
<head>
  <style>
    .container {
      display: flex;
    }
  </style>
</head>

<body>
  <div class="container">
    <div class="box1" style="height:50px; width:50px; background-color:yellow;"></div>
    <div class="box2" style="height:50px; width:50px; background-color:blue;"></div>
    <div class="box3" style="height:50px; width:50px; background-color:red;"></div>
    <div class="box4" style="height:50px; width:50px; background-color:grey;"></div>
    <div class="box5" style="height:50px; width:50px; background-color:purple;"></div>
    <div class="box6" style="height:50px; width:50px; background-color:green;"></div>
  </div>
</body>
</html>
기본적으로 display:flex 지정 시 아래와 같이 한 행에 모든 요소가 들어오게 되며 컨테이너의 시작점에 정렬됩니다.

세로로 방향 바꾸기
{ flex-direction: column; }
<!DOCTYPE html>
<html>
<head>
  <style>
    .container {
      display: flex;
      flex-direction: column;
    }
  </style>
</head>

<body>
  <div class="container">
    <div class="box1" style="height:50px; width:50px; background-color:yellow;"></div>
    <div class="box2" style="height:50px; width:50px; background-color:blue;"></div>
    <div class="box3" style="height:50px; width:50px; background-color:red;"></div>
    <div class="box4" style="height:50px; width:50px; background-color:grey;"></div>
    <div class="box5" style="height:50px; width:50px; background-color:purple;"></div>
    <div class="box6" style="height:50px; width:50px; background-color:green;"></div>
  </div>
</body>
</html>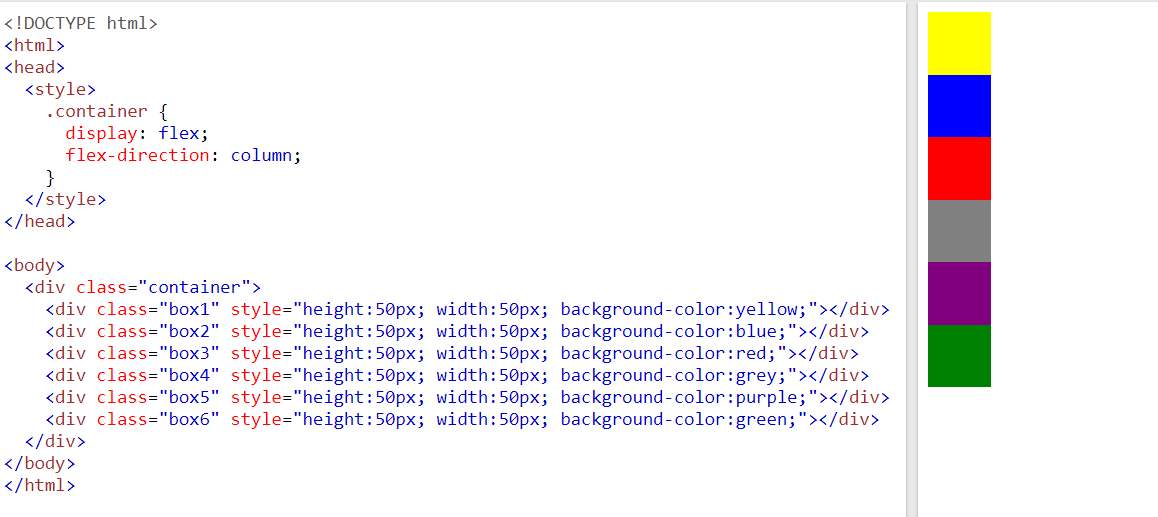
flex는 display 값만 추가하고 행 또는 열 방향으로 위와 같이 설정해 주면 완료입니다. 플렉스의 가장 큰 장점은 컨테이너 내부의 박스들의 위치를 자유롭게 조정할 수 있다는 점인데요.
먼저 flex-basis는 열이나 행의 방향에 따라 박스가 가지는 기본 높이나 너비를 지정해 줍니다.
{ flex-basis: 100px; }<!DOCTYPE html>
<html lang="en">
<head>
<style>
.container {
display: flex;
}
.box {
flex-basis: 100px;
}
</style>
</head>
<body>
<div class="container">
<div class="box box1" style="height:50px; background-color:yellow;"></div>
<div class="box box2" style="height:50px; background-color:blue;"></div>
<div class="box box3" style="height:50px; background-color:red;"></div>
<div class="box box4" style="height:50px; background-color:grey;"></div>
<div class="box box5" style="height:50px; background-color:purple;"></div>
<div class="box box6" style="height:50px; background-color:green;"></div>
</div>
</body>
</html>
flex-grow는 컨테이너의 남는 공백이 있을 때 그 공백을 메꾸어 줍니다. 여기서 숫자는 차지할 비율을 의미합니다.
{ flex-grow: 1; }<!DOCTYPE html>
<html lang="en">
<head>
<style>
.container {
display: flex;
}
.box {
flex-basis: 100px;
}
.box1 {
flex-grow: 1;
}
</style>
</head>
<body>
<div class="container">
<div class="box box1" style="height:50px; background-color:yellow;"></div>
<div class="box box2" style="height:50px; background-color:blue;"></div>
<div class="box box3" style="height:50px; background-color:red;"></div>
<div class="box box4" style="height:50px; background-color:grey;"></div>
<div class="box box5" style="height:50px; background-color:purple;"></div>
<div class="box box6" style="height:50px; background-color:green;"></div>
</div>
</body>
</html>
반대로, flex-shrink는 컨테이너가 작아질 때 박스의 크기도 같이 줄여줍니다. 기본적으로 줄어들게 설정이 되므로 원하지 않는 경우 값을 0을 설정하여 이를 해제합니다.
{ flex-shrink: 1; }<!DOCTYPE html>
<html lang="en">
<head>
<style>
.container {
display: flex;
}
.box {
flex-basis: 100px;
flex-shrink: 0;
}
.box1 {
flex-grow: 1;
}
.box3 {
flex-shrink: 1;
}
</style>
</head>
<body>
<div class="container">
<div class="box box1" style="height:50px; background-color:yellow;"></div>
<div class="box box2" style="height:50px; background-color:blue;"></div>
<div class="box box3" style="height:50px; background-color:red;"></div>
<div class="box box4" style="height:50px; background-color:grey;"></div>
<div class="box box5" style="height:50px; background-color:purple;"></div>
<div class="box box6" style="height:50px; background-color:green;"></div>
</div>
</body>
</html>
flex속성으로 위 세 가지를 한 번에 지정가능합니다.
{ flex: 1, 1, 10px; }
정렬하기
정렬은 컨테이너에 속성을 추가해서 지정합니다. 주의할 점은 컨테이너의 방향에 따라 'justify'와 'align'의 방향이 달라진 다는 점입니다. justify는 플렉스의 방향이 행일 때 가로이고 열일 때는 세로 align은 그 반대라고 생각하면 편리함.
[justify] 컨테이너의 중앙으로 정렬
.container {
  display: flex;
  justify-content: center;
}
.container {
  display: flex;
  flex-direction: column;
  justify-content: center;
}
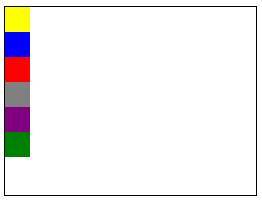
[justify] 컨테이너의 시작으로 정렬
.container {
  display: flex;
  flex-direction: column;
  justify-content: flex-start; /* 또는 justify-content: start; */
}
.container {
  display: flex;
  flex-direction: column;
  justify-content: flex-start;
}
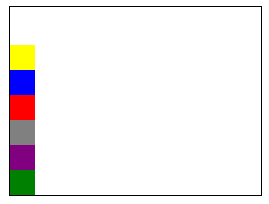
[justify] 컨테이너의 끝으로 정렬
.container {
  display: flex;
  justify-content: flex-end; /* 또는 justify-content: end; */
}
.container {
  display: flex;
  flex-direction: column;
  justify-content: flex-end; /* 또는 justify-content: end; */
}
[justify] 분배
.container {
  display: flex;
  justify-content: space-around; /* 박스사이에 같은 간격을 두고 처음과 끝의 박스와 컨테이너는 박스 간의 간격의 절반의 거리를 둠 */
}
.container {
  display: flex;
  justify-content: space-between; /* 박스사이에 같은 간격을 두고 처음과 끝의 박스와 컨테이너는 박스 간의 간격을 두지않음 */
}
.container {
  display: flex;
  justify-content: space-evenly; /* 박스사이에 같은 간격을 둠 (박스와 컨테이너와의 간격도 동일)*/
}
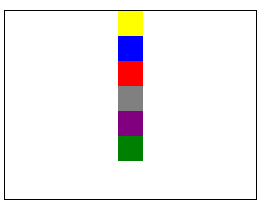
[align] 컨테이너의 중앙으로 정렬
.container {
  display: flex;
  align-items: center;
}
.container {
  display: flex;
  flex-direction: column;
  align-items: center;
}
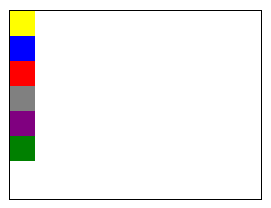
[align] 컨테이너의 시작으로 정렬
.container {
  display: flex;
  align-items: flex-start; /* 또는 align-itmes: start; */
}
.container {
  display: flex;
  flex-direction: column;
  align-items: flex-start; /* 또는 align-itmes: start; */
}
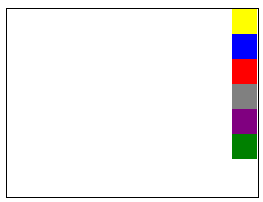
[align] 컨테이너의 끝으로 정렬
.container {
  display: flex;
  align-items: flex-end; /* 또는 align-items: end; */
}
.container {
  display: flex;
  flex-direction: column;
  align-items: flex-end; /* 또는 align-items: end; */
}
중앙으로 정렬
{
  justify-content: center;
  align-items: center;
}
마무리
이상으로 flex를 사용하는 방법을 알아보았습니다.
참고
CSS flex property
W3Schools offers free online tutorials, references and exercises in all the major languages of the web. Covering popular subjects like HTML, CSS, JavaScript, Python, SQL, Java, and many, many more.
www.w3schools.com
'프론트엔드 > CSS' 카테고리의 다른 글
| Fixed (0) | 2022.12.29 |
|---|---|
| Grid (0) | 2022.12.29 |
| Viewport (0) | 2022.12.29 |
| Media queries (0) | 2022.12.29 |
| CSS 컴포넌트 - 토글버튼 (0) | 2022.12.20 |


